DIY Rori Wrap Top Tutorial
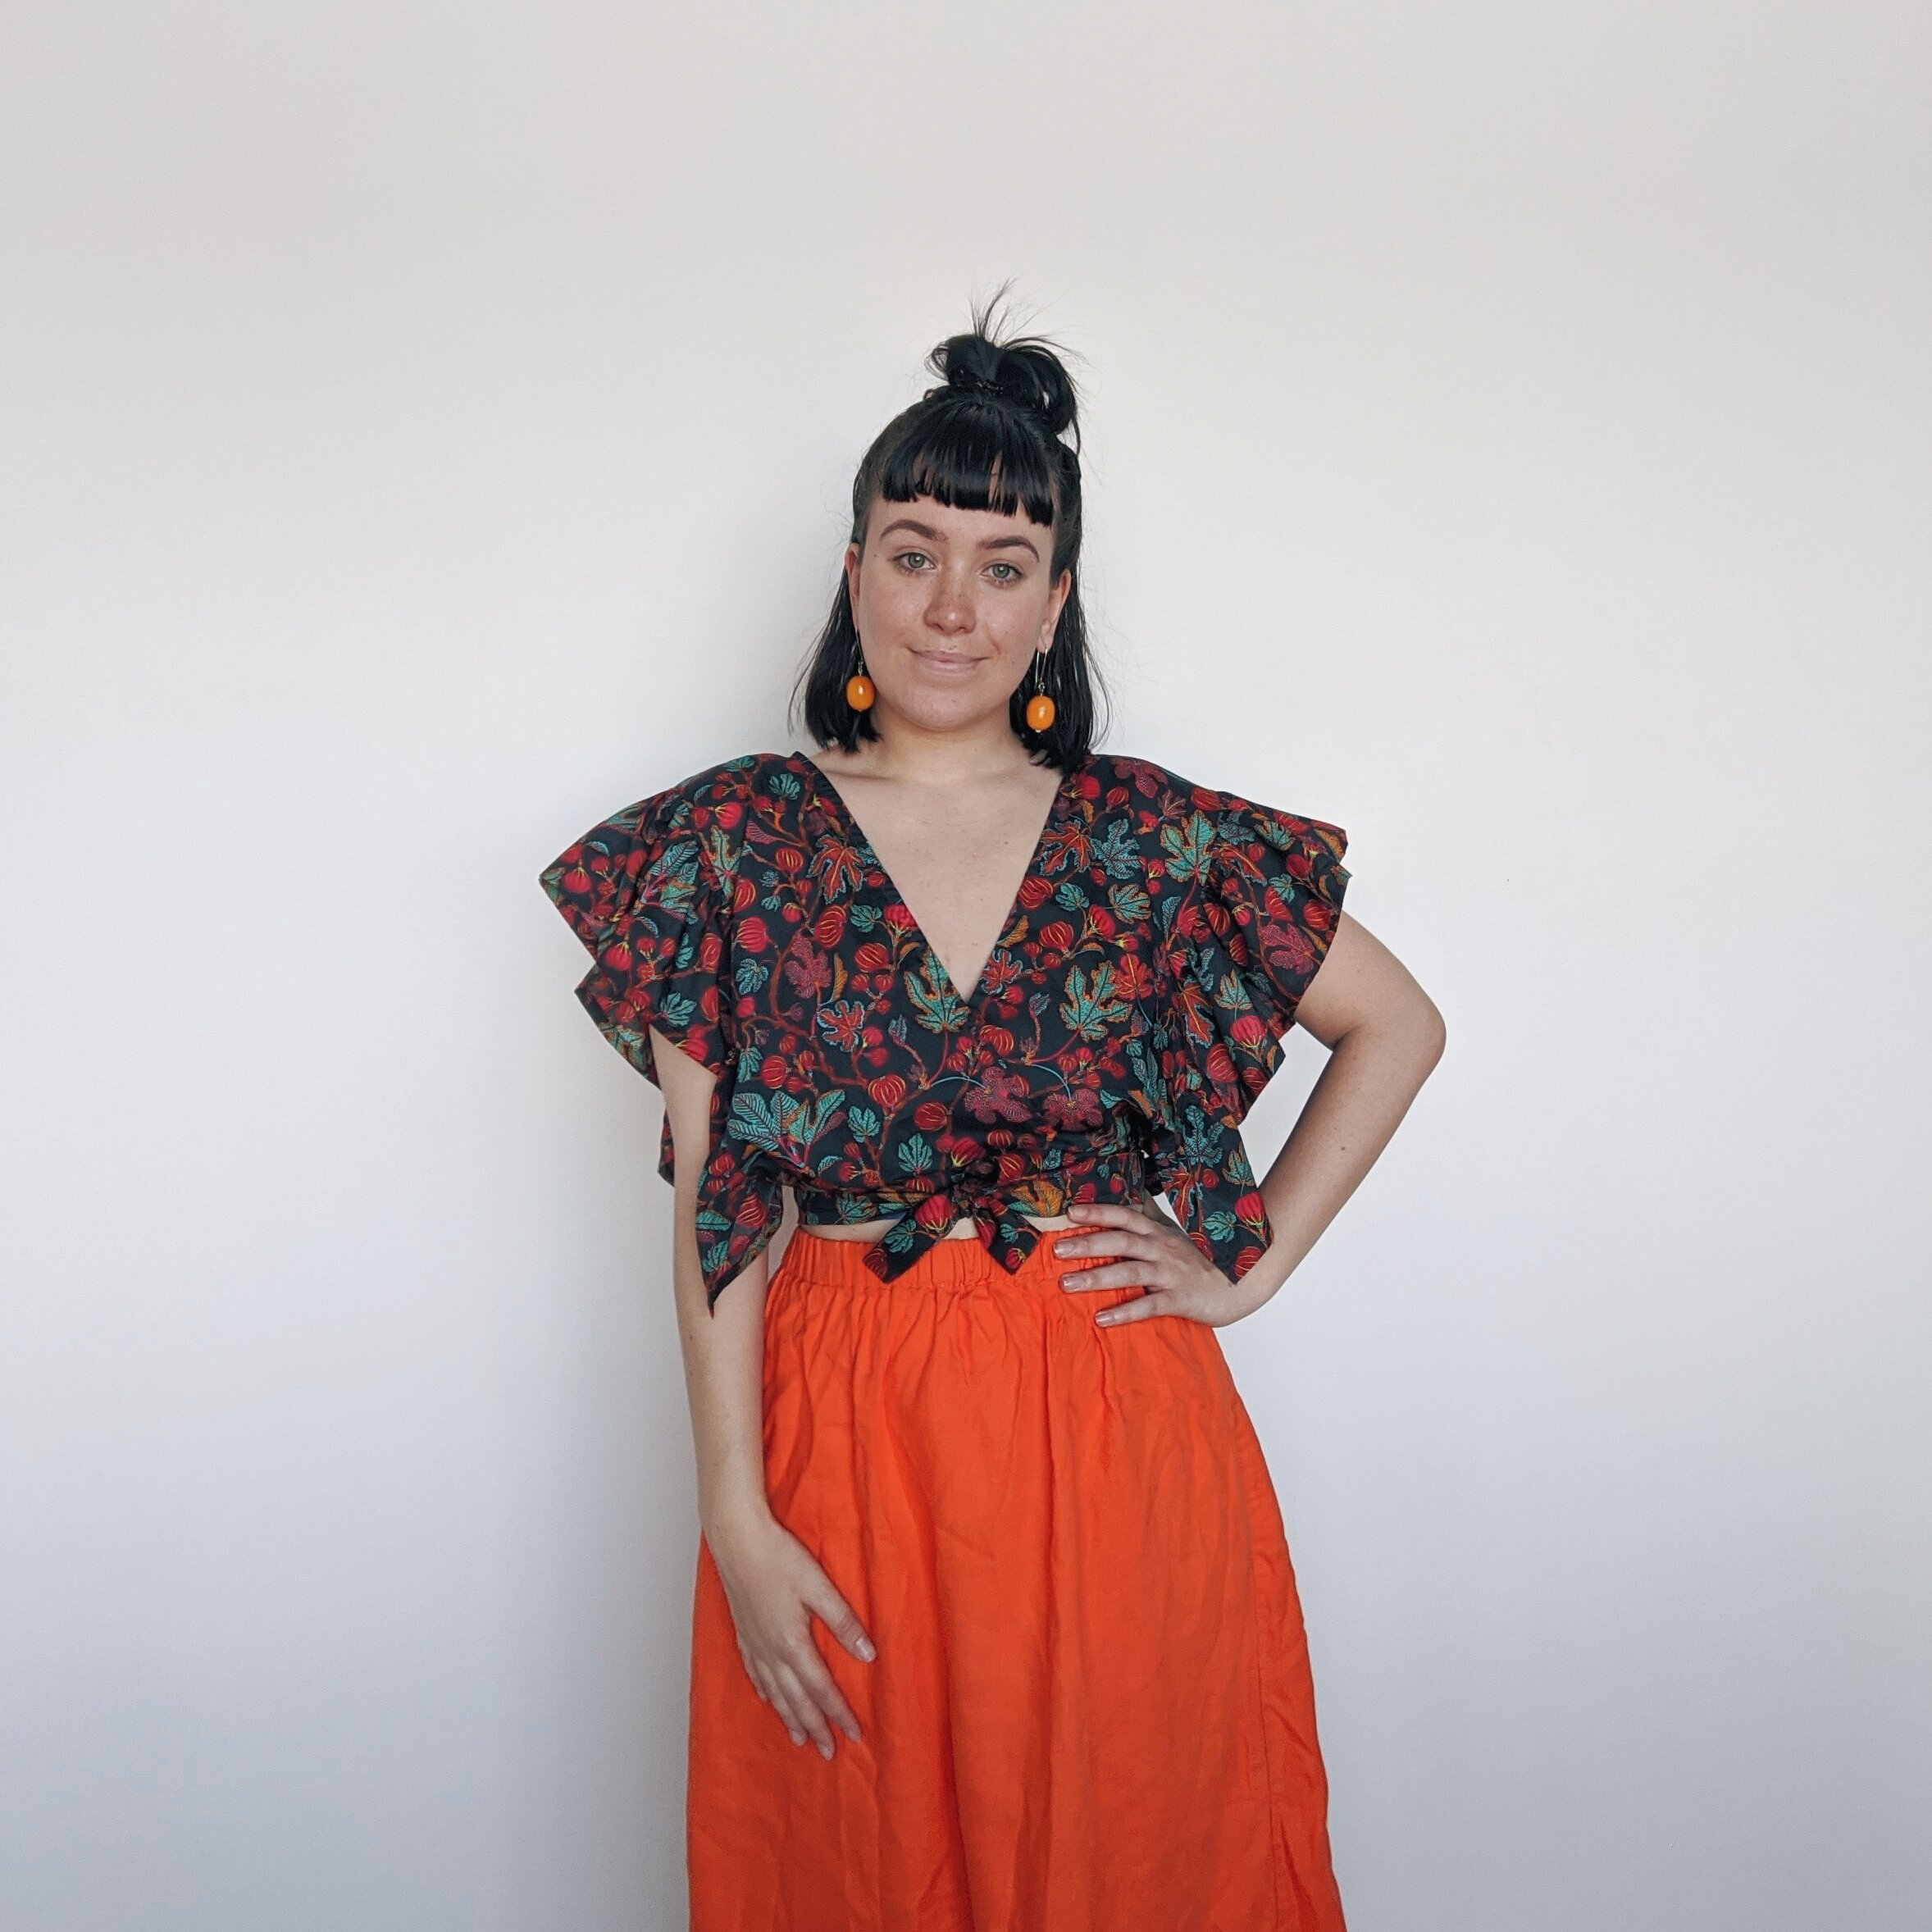
I thought it was about time I named some of my DIY tutorials, so to kick it off, meet the Rori Wrap Top. Originally the Ruffle Wrap Top, this top is named after my twin sister Aurora, whose nickname is Rori. She is a 50s fashion queen and is my biggest supporter, so I had to dedicate this one to her.
Designed during self-isolation, the Rori Wrap Top is a reversible ruffle-sleeved top that ties around the waist. One side features a round bias-bound neckline and the other crosses over with a v-neck. I made this one with 1m of woven linen fabric, which took less than 3 hours to complete. If you give this DIY a try, don't forget to use #roriwraptop so I can see your creation!
Please Note:
This sewing pattern tutorial is for personal, non-commercial use only and no part of this post may be reproduced, transmitted, or shared in any form. Please do not produce items with this pattern and tutorial for resale.
Sizing:
I based this pattern off my measurements as an Australian size 12-14 and Liberty Tana Lawn which is 136cm wide. My measurements are: High bust 93cm, Full bust 99cm and Waist 84cm. If you try to DIY this for yourself, I suggest making a toile first to check how it fits on you. Good luck!
Note: I am not a professional pattern maker and I have no formal training. I am just a self-taught lover of sewing. I have tried to make these instructions as easy and clear as possible but there may be some areas that are lacking. If you get stuck, check my TikTok video or send me a message on Instagram and I will try my best to help you :)
You will need:
1 meter of woven fabric. Minimum width 135cm. You will need more fabric if you want to adjust the size.
Matching thread
Scissors
4 meters of bias binding
Iron & board
Sewing Machine
Measuring Tape
How to make a Rori Wrap Top:
Watch my TikTok video about how to construct this top HERE.
Cut out the pattern pieces.
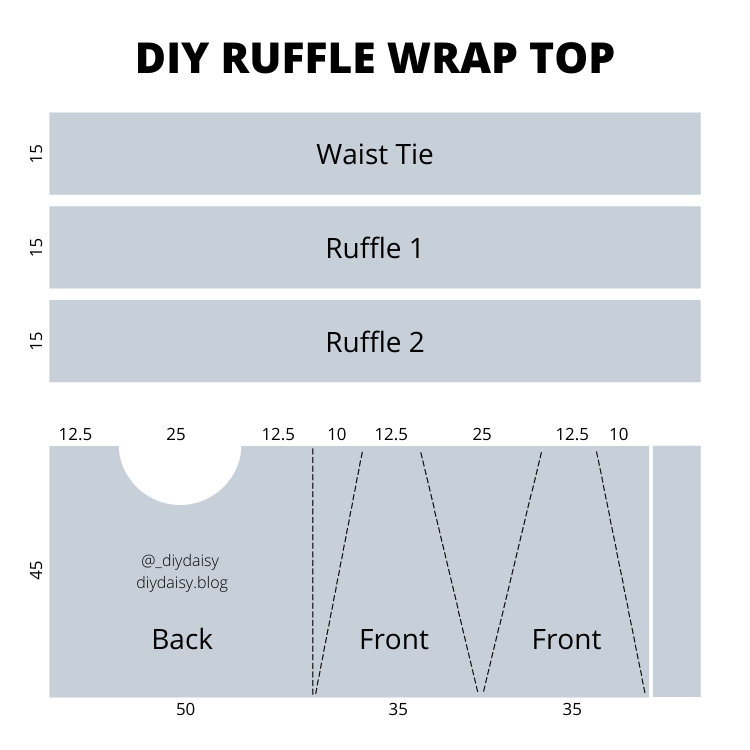
2 x Ruffle – 15cm x 140cm
1 x Waist Tie – 15cm x 140cm
1 x Back Panel 45cm x 50cm (neck hole is 25cm across and about 8cm deep)
2 x Front Panel (Left and Right)Sew up the shoulder seams.
Bind the neckline using 1.25 meters of bias binding.
Time for ruffles! Hem 3 edges of the two ruffle pieces and then gather the raw edge. I use a gathering foot but you can use the traditional method. The finished ruffle length should be 70cm.
Attach the ruffles. You will notice the edges below the ruffles are still raw, I just folded them over once and stitched up to where the ruffle starts.
With the tie rectangle, fold in half and press. Then open it up and fold each side to the center line and press. You should end up with something that looks like a really big double fold bias binding.
Attach the tie to the back.
Cut the remaining bias binding in half and attach each piece to the front to create waist ties.
Press all over and cut off any loose threads.
Try it on and show off your new me made creation! Don't forget... It's reversible!
I got this Liberty Tana Lawn called Alma from The Fabric Store.
This print is no longer available but they have lots of other beautiful prints to choose from.
I hope you love this DIY as much as I did! If you make one of these tops for yourself, share it with me on Instagram using #roriwraptop.


