DIY Maya Ruffle Dress & Top Tutorial
Reintroducing the Maya Ruffle Dress & Top, a generous fitting trans-seasonal piece that produces little waste with super fun and frilly results! Originally the Rectangle Ruffle Top, this DIY is named after my little sister Amaya (Ah-may-ah).
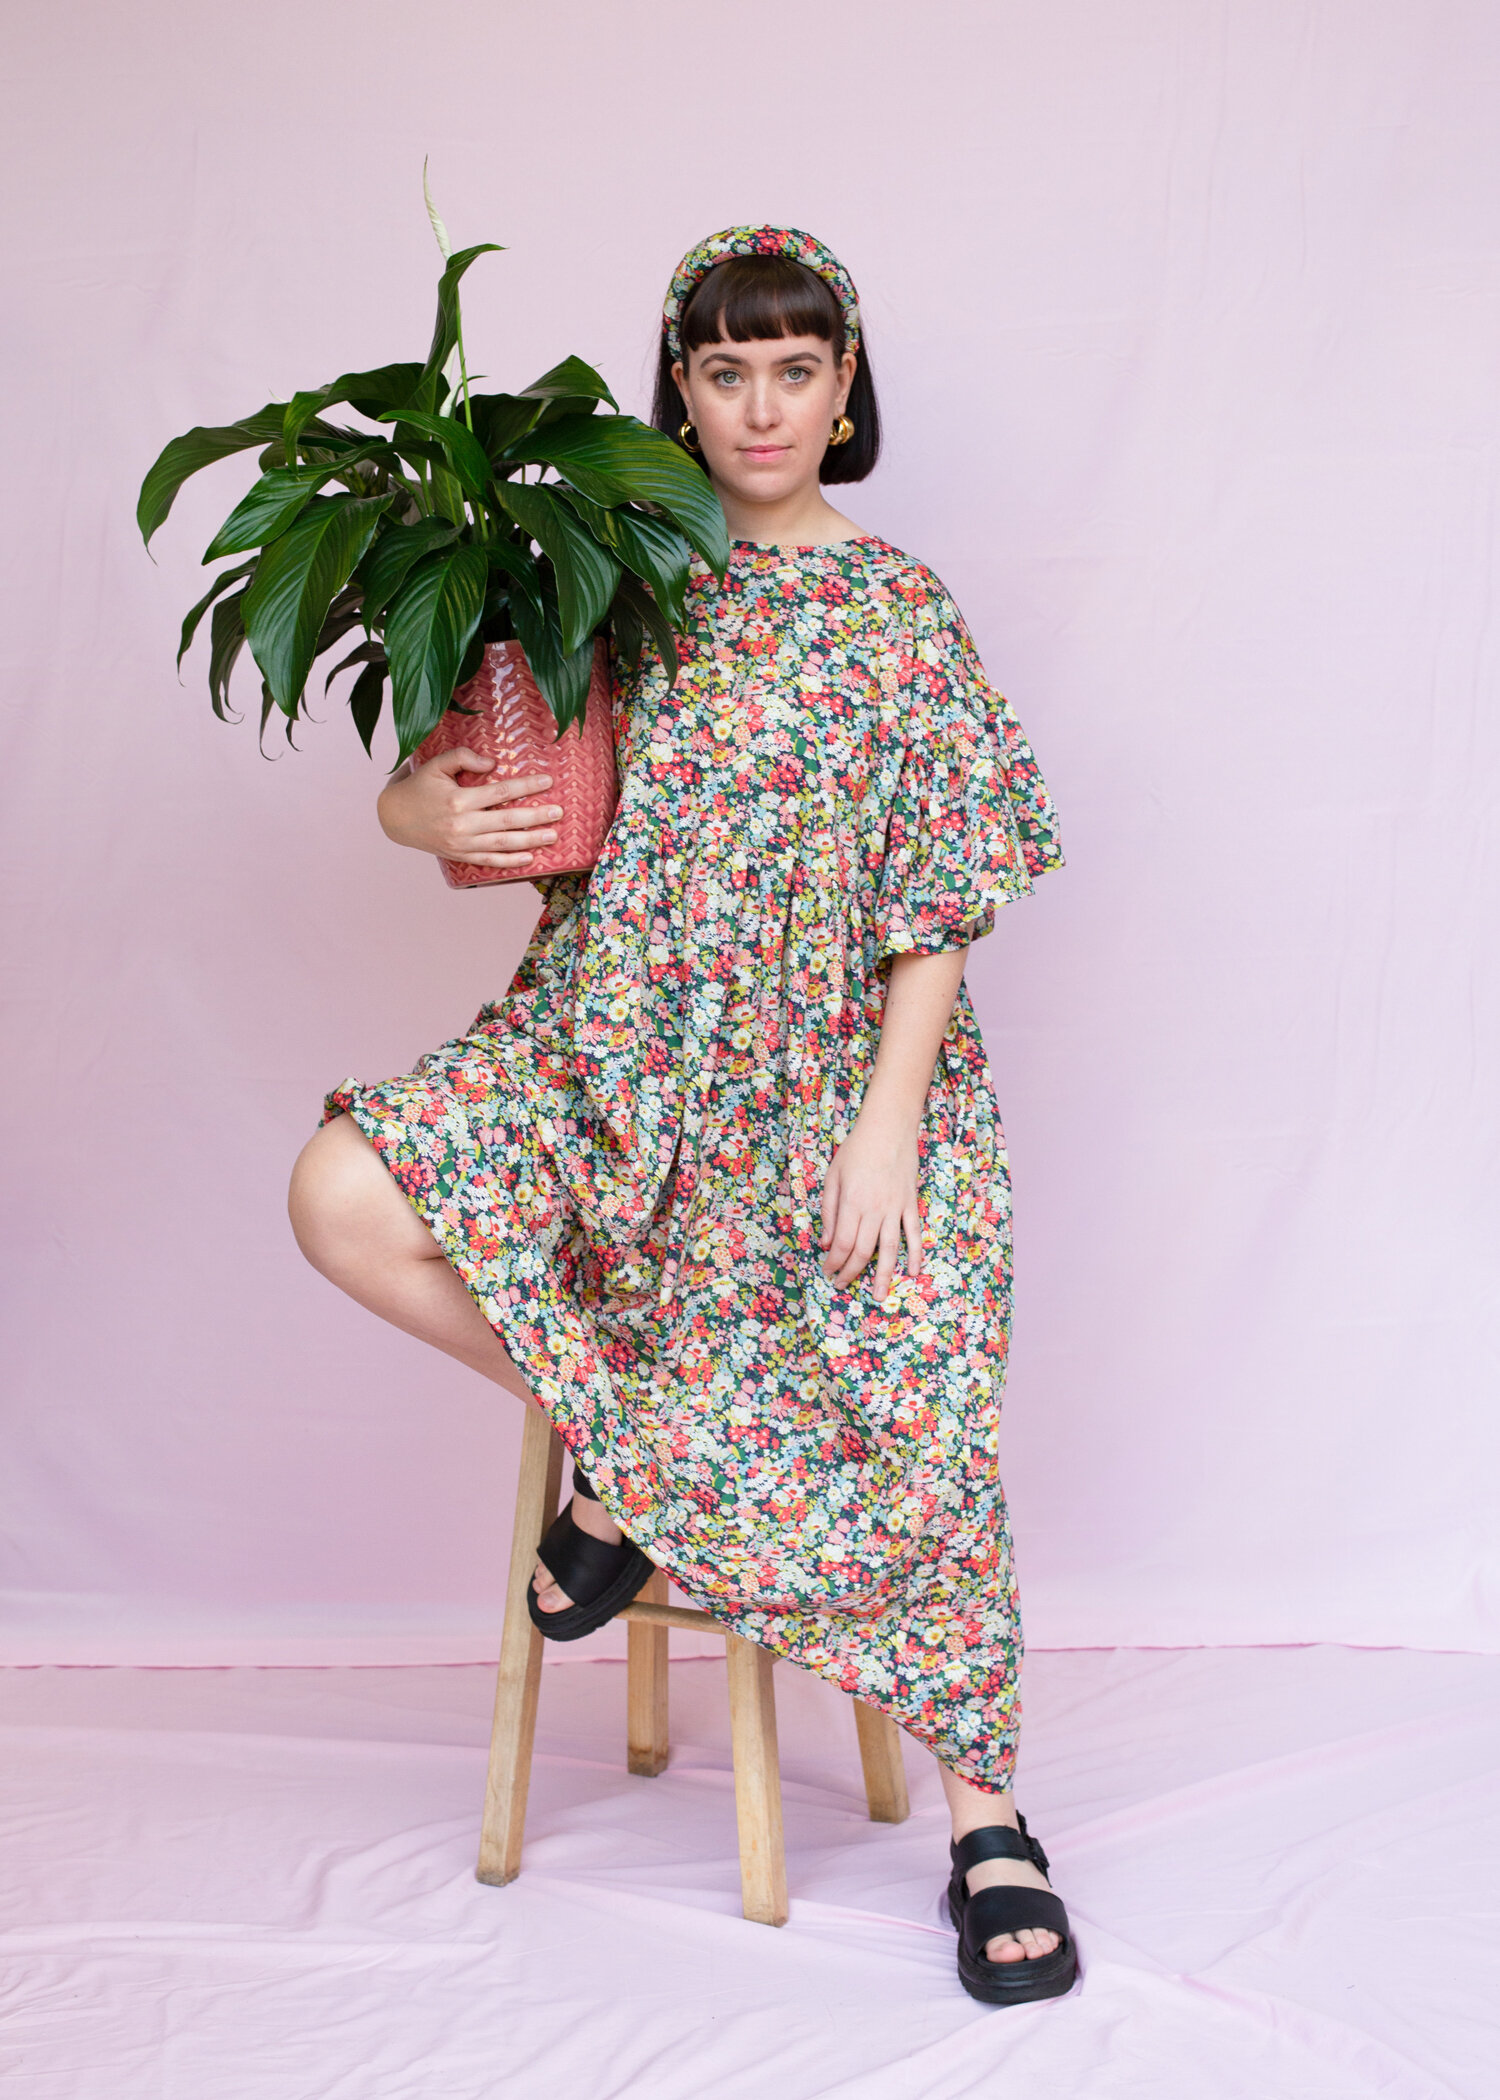
The Maya (May-ah) Ruffle Dress & Top was designed during a hot and sticky summer living in Tokyo when I wanted something floaty and fun. It is made up entirely of rectangles which means it produces very little waste and can be easily altered to fit a number of sizes. It features a scooped bound neckline, dropped ruffle sleeves and skirt panels gathered onto the bodice under the bust.
Please note:
This sewing pattern tutorial is for personal, non-commercial use only, and no part of this post may be reproduced, transmitted, or shared in any form. Please do not produce items with this pattern and tutorial for resale.


How to make a Maya Ruffle Dress or Top:
You will need:
Woven fabric (non stretchy fabric)
Bias binding
Matching thread
Sewing machine
Sewing scissors
Measuring tape
Pins
Sewing chalk or a pencil
Iron and ironing board


Fabric required:

To determine how much fabric you will need, I suggest drawing up a little diagram like this, writing your measurements and then adding up the heights. This is the layout I use when cutting out my rectangles from a length of fabric. I’ve also listed the rectangle measurements I have used for the Maya tops and dresses I have made. These are supplied to be a reference, always use your own measurements in the formula. (width x height)
Arm Bust = Wrap your measuring tape around your body and arms at full bust.
Bodice (Top front and back - Cut 2):
Width = Arm Bust / 2 + 2cm seam allow
Height = Top of shoulder to waist + 2cm seam allowance
Sleeves (Cut 2)
Width = Bodice rectangle height x 2 + 2cm seam allowance (or use the full width of the fabric)
Height = 25cm + 2cm seam allowance
Skirt (Cut 2)
Width = Bodice rectangle width x 2
Height = Waist to desired length
Maya Ruffle Dress:
Size 8: Top - 52cm x 38cm, Sleeve - 136cm x 24cm, Skirt - 104cm x 100cm, Fabric Used - 2.86m (136cm wide)
Size 12: Top - 62cm x 42cm, Sleeve - 136cm x 24cm, Skirt - 122cm x 100cm, Fabric Used - 2.90m (136cm wide)
Maya Ruffle Top:
Size 8: Top - 52cm x 38cm, Sleeve - 136cm x 24cm, Peplum - 104cm x 22cm, Fabric Used - 1.26m (136cm wide)
Size 12: Top - 62cm x 42cm, Sleeve - 136cm x 24cm, Peplum - 122cm x 22cm, Fabric Used - 1.30m (136cm wide)
Size 16: Top - 68cm x 44cm, Sleeve - 136cm x 24cm, Peplum - 136cm x 24cm, Fabric Used - 1.40m (136cm wide)
The fabric I used is a gorgeous Liberty Tana Lawn from The Fabric Store called Thorpe.


Method:
Watch the process of making a Maya Ruffle Dress in this Tiktok video before starting.
Cut out your rectangles.
Cut the shape of the neck hole. To do this I fold my top rectangles in half, right sides together and trace the neckline from a top (or pattern) that I like the shape of.
Sew up 1 shoulder seam. I like to french seam my shoulder seams to make them nice and strong.
Bind the neckline with bias binding.
French seam the other shoulder seam.
Gather one edge of the sleeve rectangles. Once gathered my rectangles measured 48cm long.
Attach the sleeves by finding the centre, lining it up with the shoulder seam. Pin the sleeves on and then sew up with a straight stitch.
Gather one edge of the skirt/peplum rectangles. Once gathered they should measure the same as the width of the top rectangle. Attach the skirt/peplum rectangles by finding the centre, lining it up with the centre of the top rectangle. Pin the skirt on and then sew with a straight stitch.
With right sides together, sew up the side seams of the whole dress.
Hem the sleeves with a 1cm double fold and the skirt/peplum to your desired length.
Press all over and snip any loose threads to finish.


These absolutely gorgeous photos were taken by the lovely and talented Ella Fitzgerald. She totally nailed the vision I had for these photos and I cannot recommend her enough. Check out more of her work @ellamayphoto on Instagram.
I hope you give this DIY a try and if you do, don’t forget to use #mayaruffledress or #mayaruffletop so I can see your creation!