DIY Tie Top Tutorial
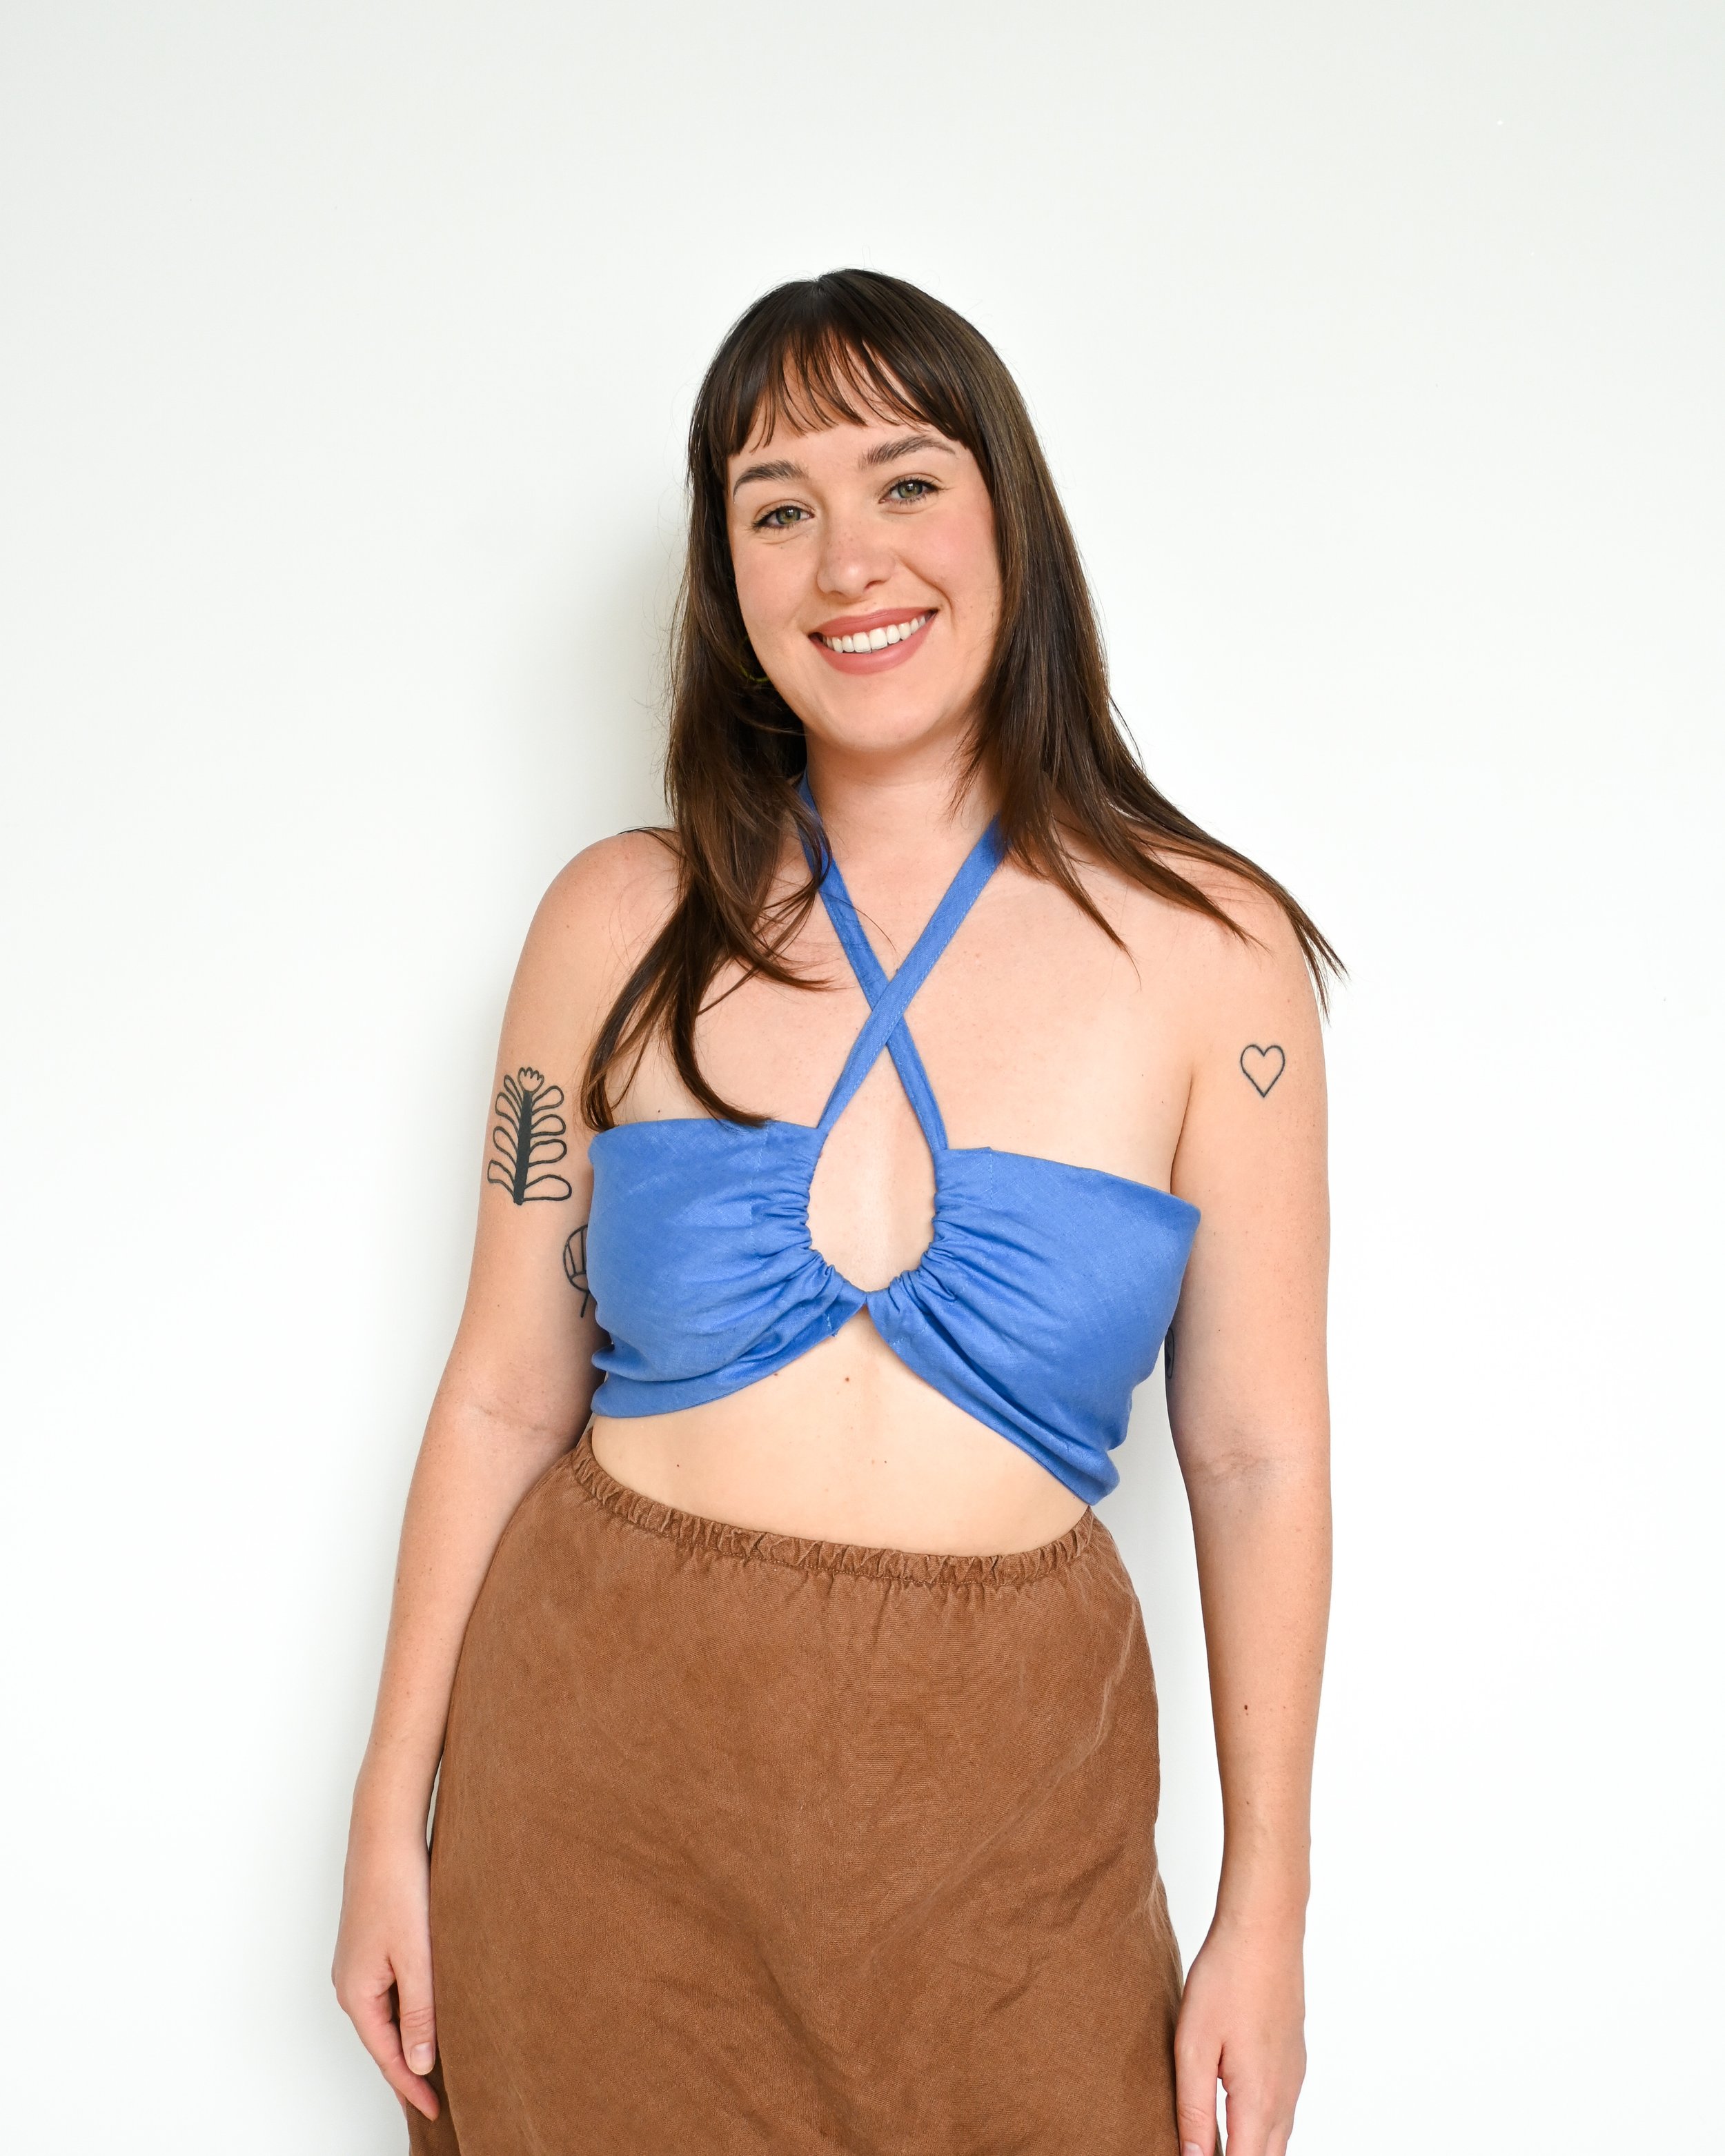
It’s time for some Summer sewing with the DIY Drawstring Tie Top Tutorial! This super simple bandeau top is the perfect pair with my Clo Bias Skirt and can be tied in a bunch of different ways - yay versatility! If your fabric is pre-washed and ready to go, this easy sewing project should only take you an hour or two. Have fun!
Update 21/12/2023:
I can't believe it’s been 3 years since I originally posted this tutorial! I’m finally giving it a little update and freshen up with some new photos and instructions. I hope you give it a try this summer and if you do, don’t forget to tag me so I can see and reshare your creation!
For this project, I used Organic Linen from The Fabric Store.
The Inspo:
My me-made wardrobe is seriously lacking in the TOP department, so this year, I plan to fill that void with super cute DIY creations. I saw this top by Paloma Wool on Pinterest and thought it looked very DIYable, so I decided to try and recreate it for myself! As I suspected, it’s just a rectangle with a drawstring. Yes, fashion can be that simple and still be so chic. Wanna make one for yourself? Learn how below!
You will need:
1m of woven fabric
Matching thread
Sewing machine
Sewing scissors
Iron & Ironing Board
Safety pin
Measuring tape & ruler
Optional - Pre cut bias binding
Formula:
Top Rectangle: Cut 1
Width = Full Bust - 10cm
Height = High bust to Waist x 2 + 2cm
Drawstring: Cut 1
Length of bias binding = 120cm-130cm
Width of bias binding = 5cm (this is the width before folding; you can use any width you’d like if you cut your own.)
To find the rectangle's dimensions that will become the top, measure your full bust and subtract 10cm. This value will be the width of your rectangle. Don’t worry if this seems a little small, this rectangle is cut on the bias to curve over the bust so it will have some ease and stretch. The other measurement we need is the height of the rectangle. To find this value, measure from your high bust to about an inch below your chest or your waist, double it and add about 2cm for seam allowance.
Notes on cutting it out:
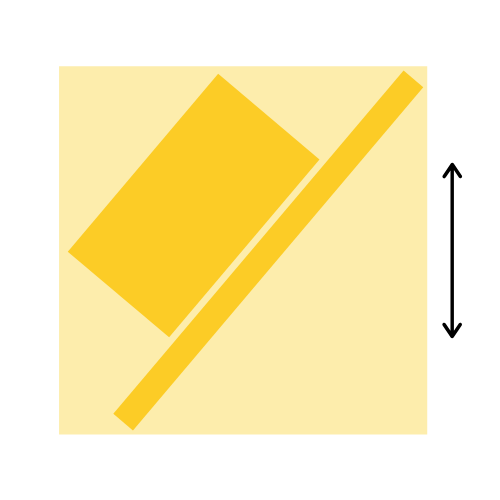
When drafting this top, I first cut it on grain, but I found the fabric didn’t quite fit and curve over my bust how I wanted it to. Then, I tried cutting it on the bias and liked it much more that way so I decided to cut all my pieces on the bias. Here is my cutting layout using 1 metre of fabric 136cm wide. My bias binding was 5cm wide.
DIY Drawstring Tie Top Tutorial:
Make a Toile! Don’t be crazy and cut into your fancy fabric until you have the perfect dimensions for YOU.
Cut out pattern pieces, remembering they are on the bias grain. If you’re not sure, you can refer to page 28 of Sew It Yourself or google something like “how to cut out on the bias" grain.
Fold the Rectangle in half right sides together and sew along all the edges with a 1cm seam allowance, leaving a 5cm hole along a short edge so that you can turn the fabric out.
Turn the fabric out and press the corners and edges. Sew the hole closed.
On one of the short edges of the rectangle, mark a 4cm line in preparation for creating a casing. Fold the edge to the line and press. Sew a straight stitch along the casing edge, backstitching at both ends to secure. Repeat on the other short edge of the rectangle so you have 2 casings, ready to insert the drawstring.
Fold the bias binding right sides together and press. Sew a straight stitch along the raw edge of the folded binding with a 3mm-5mm seam allowance. Using a safety pin, turn the drawstring out and press.
Using the same safety pin, thread the drawstring through the casings and tie small knots in the end of the drawstring.
Snip any loose threads and try on your new creation!


