DIY Gathered Rectangle Dress Tutorial
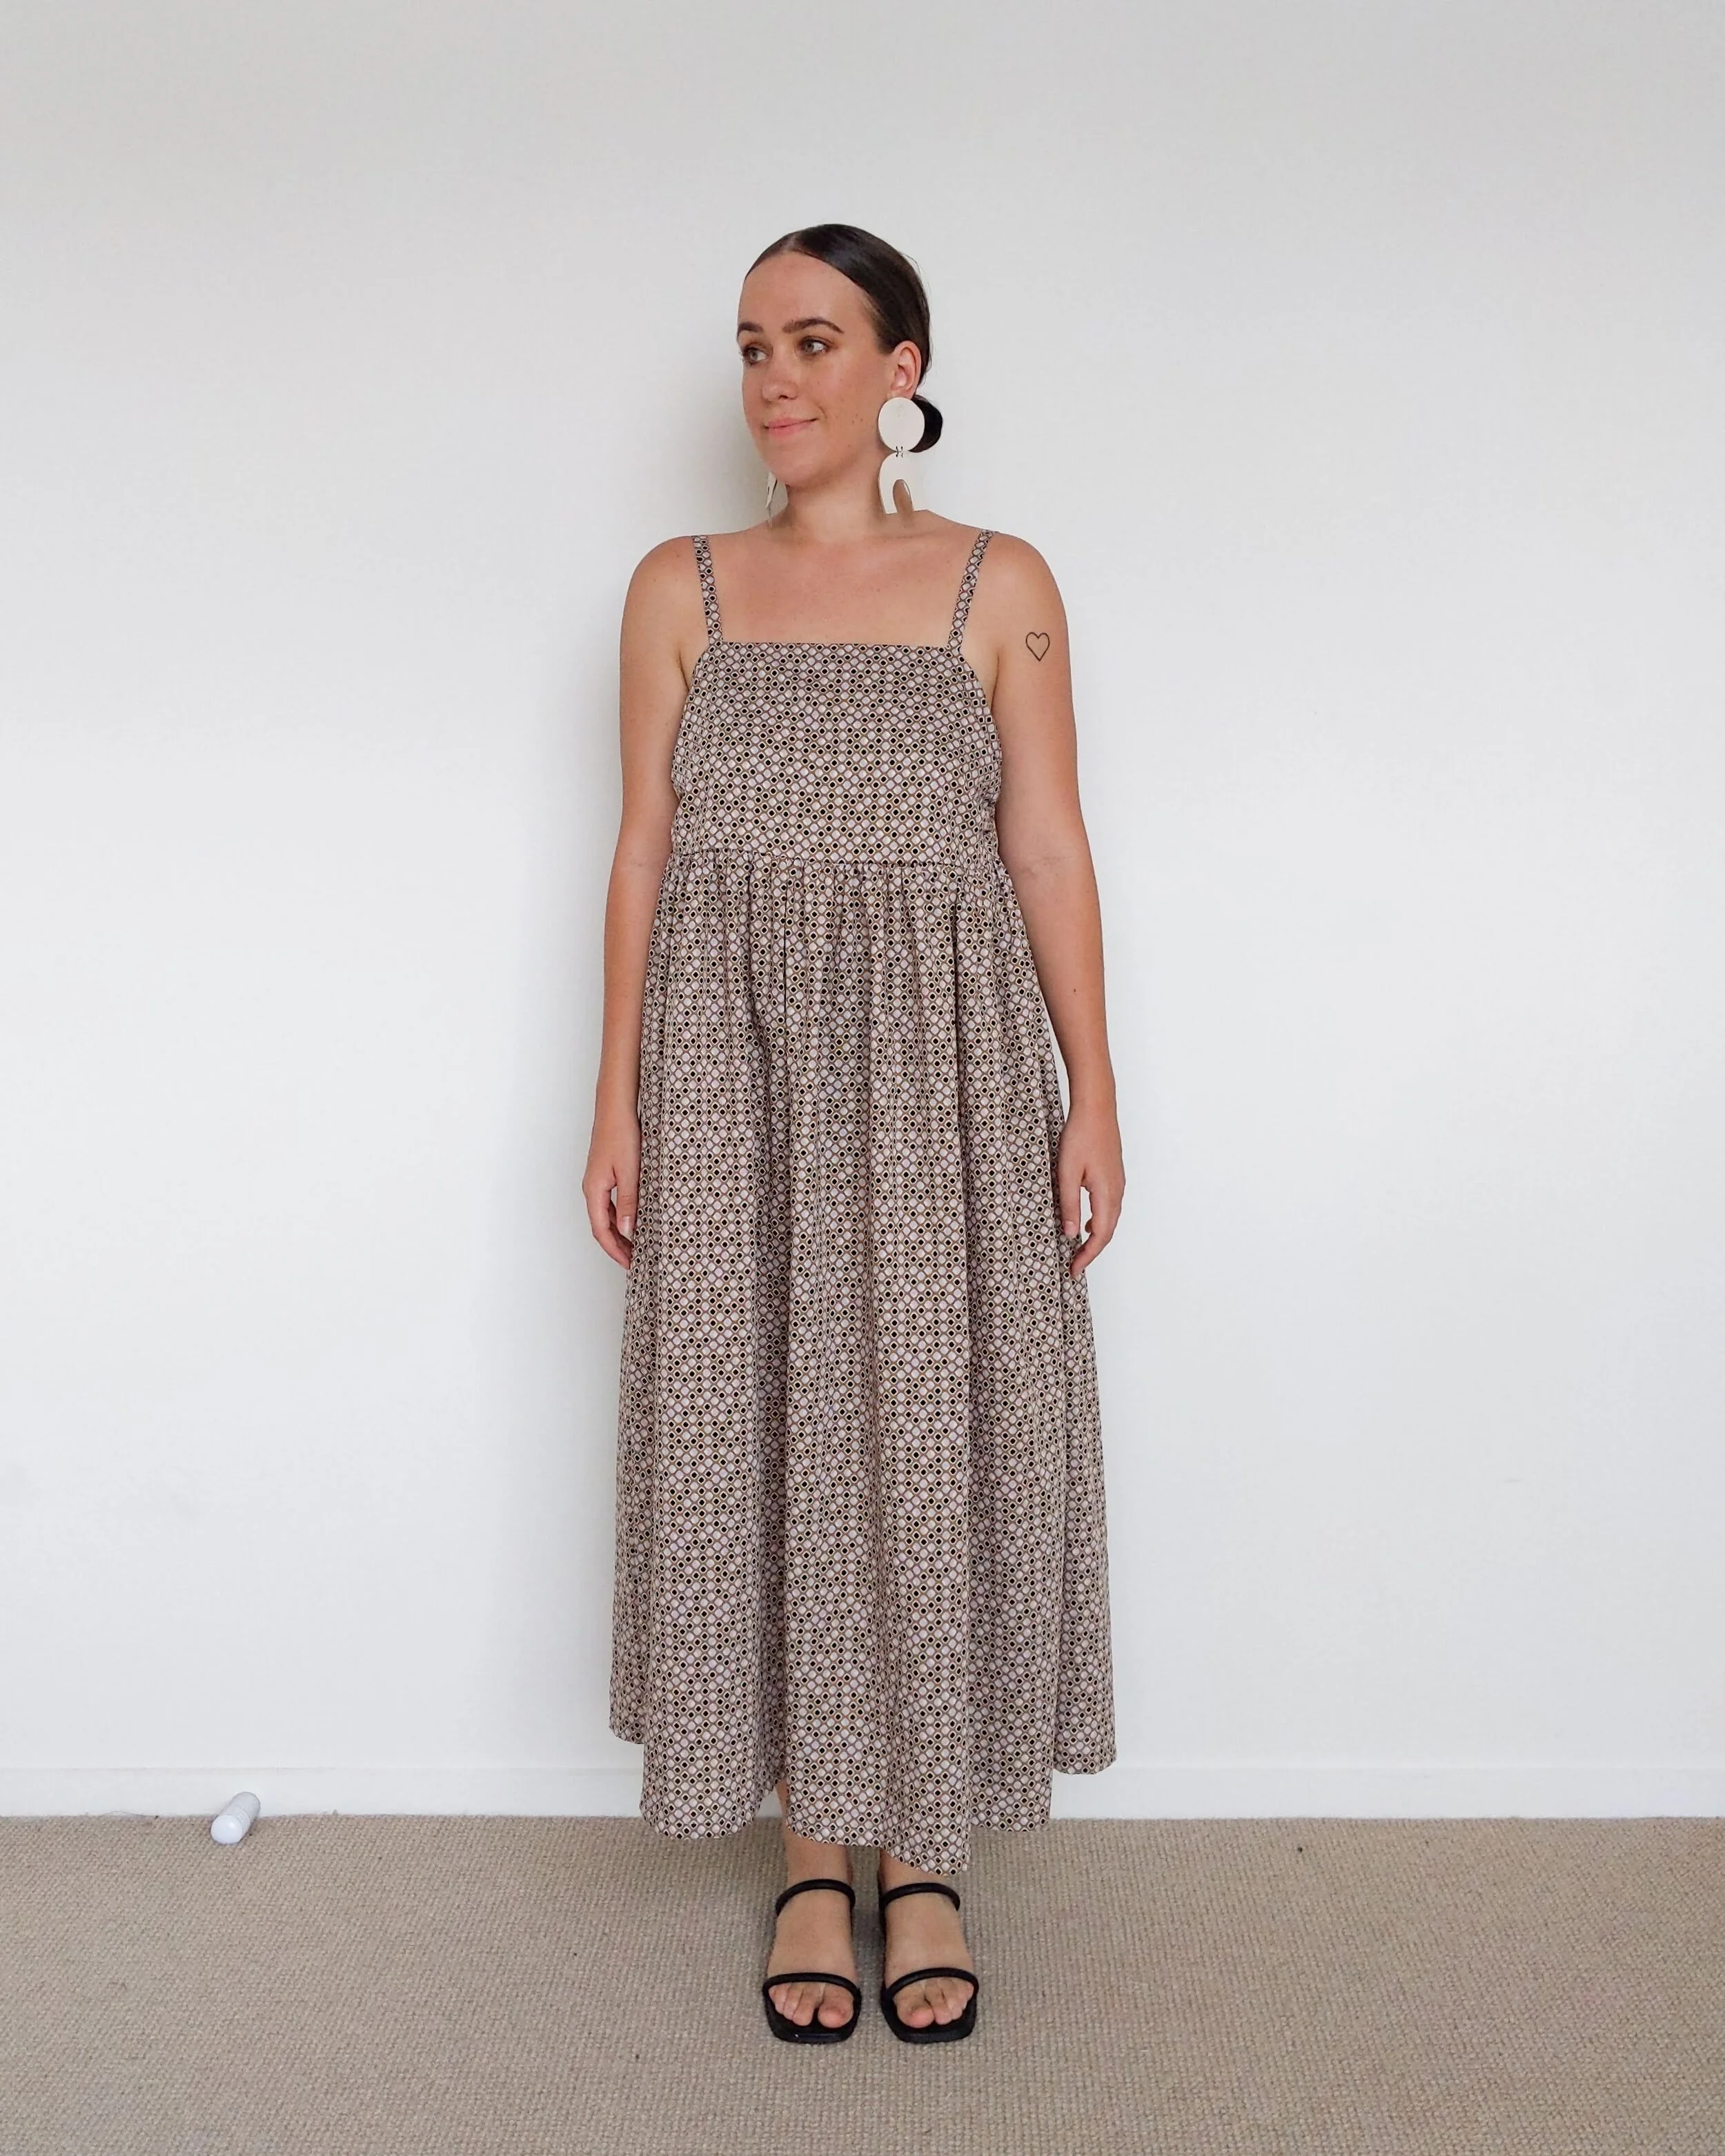
On June 4th, 2017 I shared my first ever sewing project tutorial… the Rectangle Dress! I’ve come along way in my sewing journey and I felt like it was about time I revamped and improved that tutorial so, here it is! The NEW and IMPROVED Gathered Rectangle Dress. I love this dress because It has no zippers or buttons, no darts and, you can just pull it over your head. Hope you love it too!
Please Note:
This sewing pattern tutorial is for personal, non-commercial use only and no part of this post may be reproduced, transmitted, or shared in any form. Please do not produce items with this pattern and tutorial for resale.
You will need:
Light woven (non stretchy) fabric 2.5m-3m ( I used just under 2.5m)
Matching thread
Measuring Tape
Sewing Machine
Scissors
Safety Pin
Iron & Ironing Board
DIY Gathered Rectangle Dress
Step 1.
Cut pattern pieces.
2 x Top Front
2 x Top Back
2 x Strap
2 x Skirt Rectangle
Top Front
Width = Full Bust + 5cm / 2
Height = High Bust (armpit height) to about 1 inch below bust + 2cm for seam allowance
Top Back
Width = Same as Top Front
Height = Same as Top Front - 10cm
Skirt Rectangle
Width = Top Width x 2 + 10cm
Height = Under bust to 10cm above ankle (or desired)
My Top Front = 50cm x 22cm
My Top Back = 50cm x 12cm
My Skirt Rectangle = 110cm x 95cm
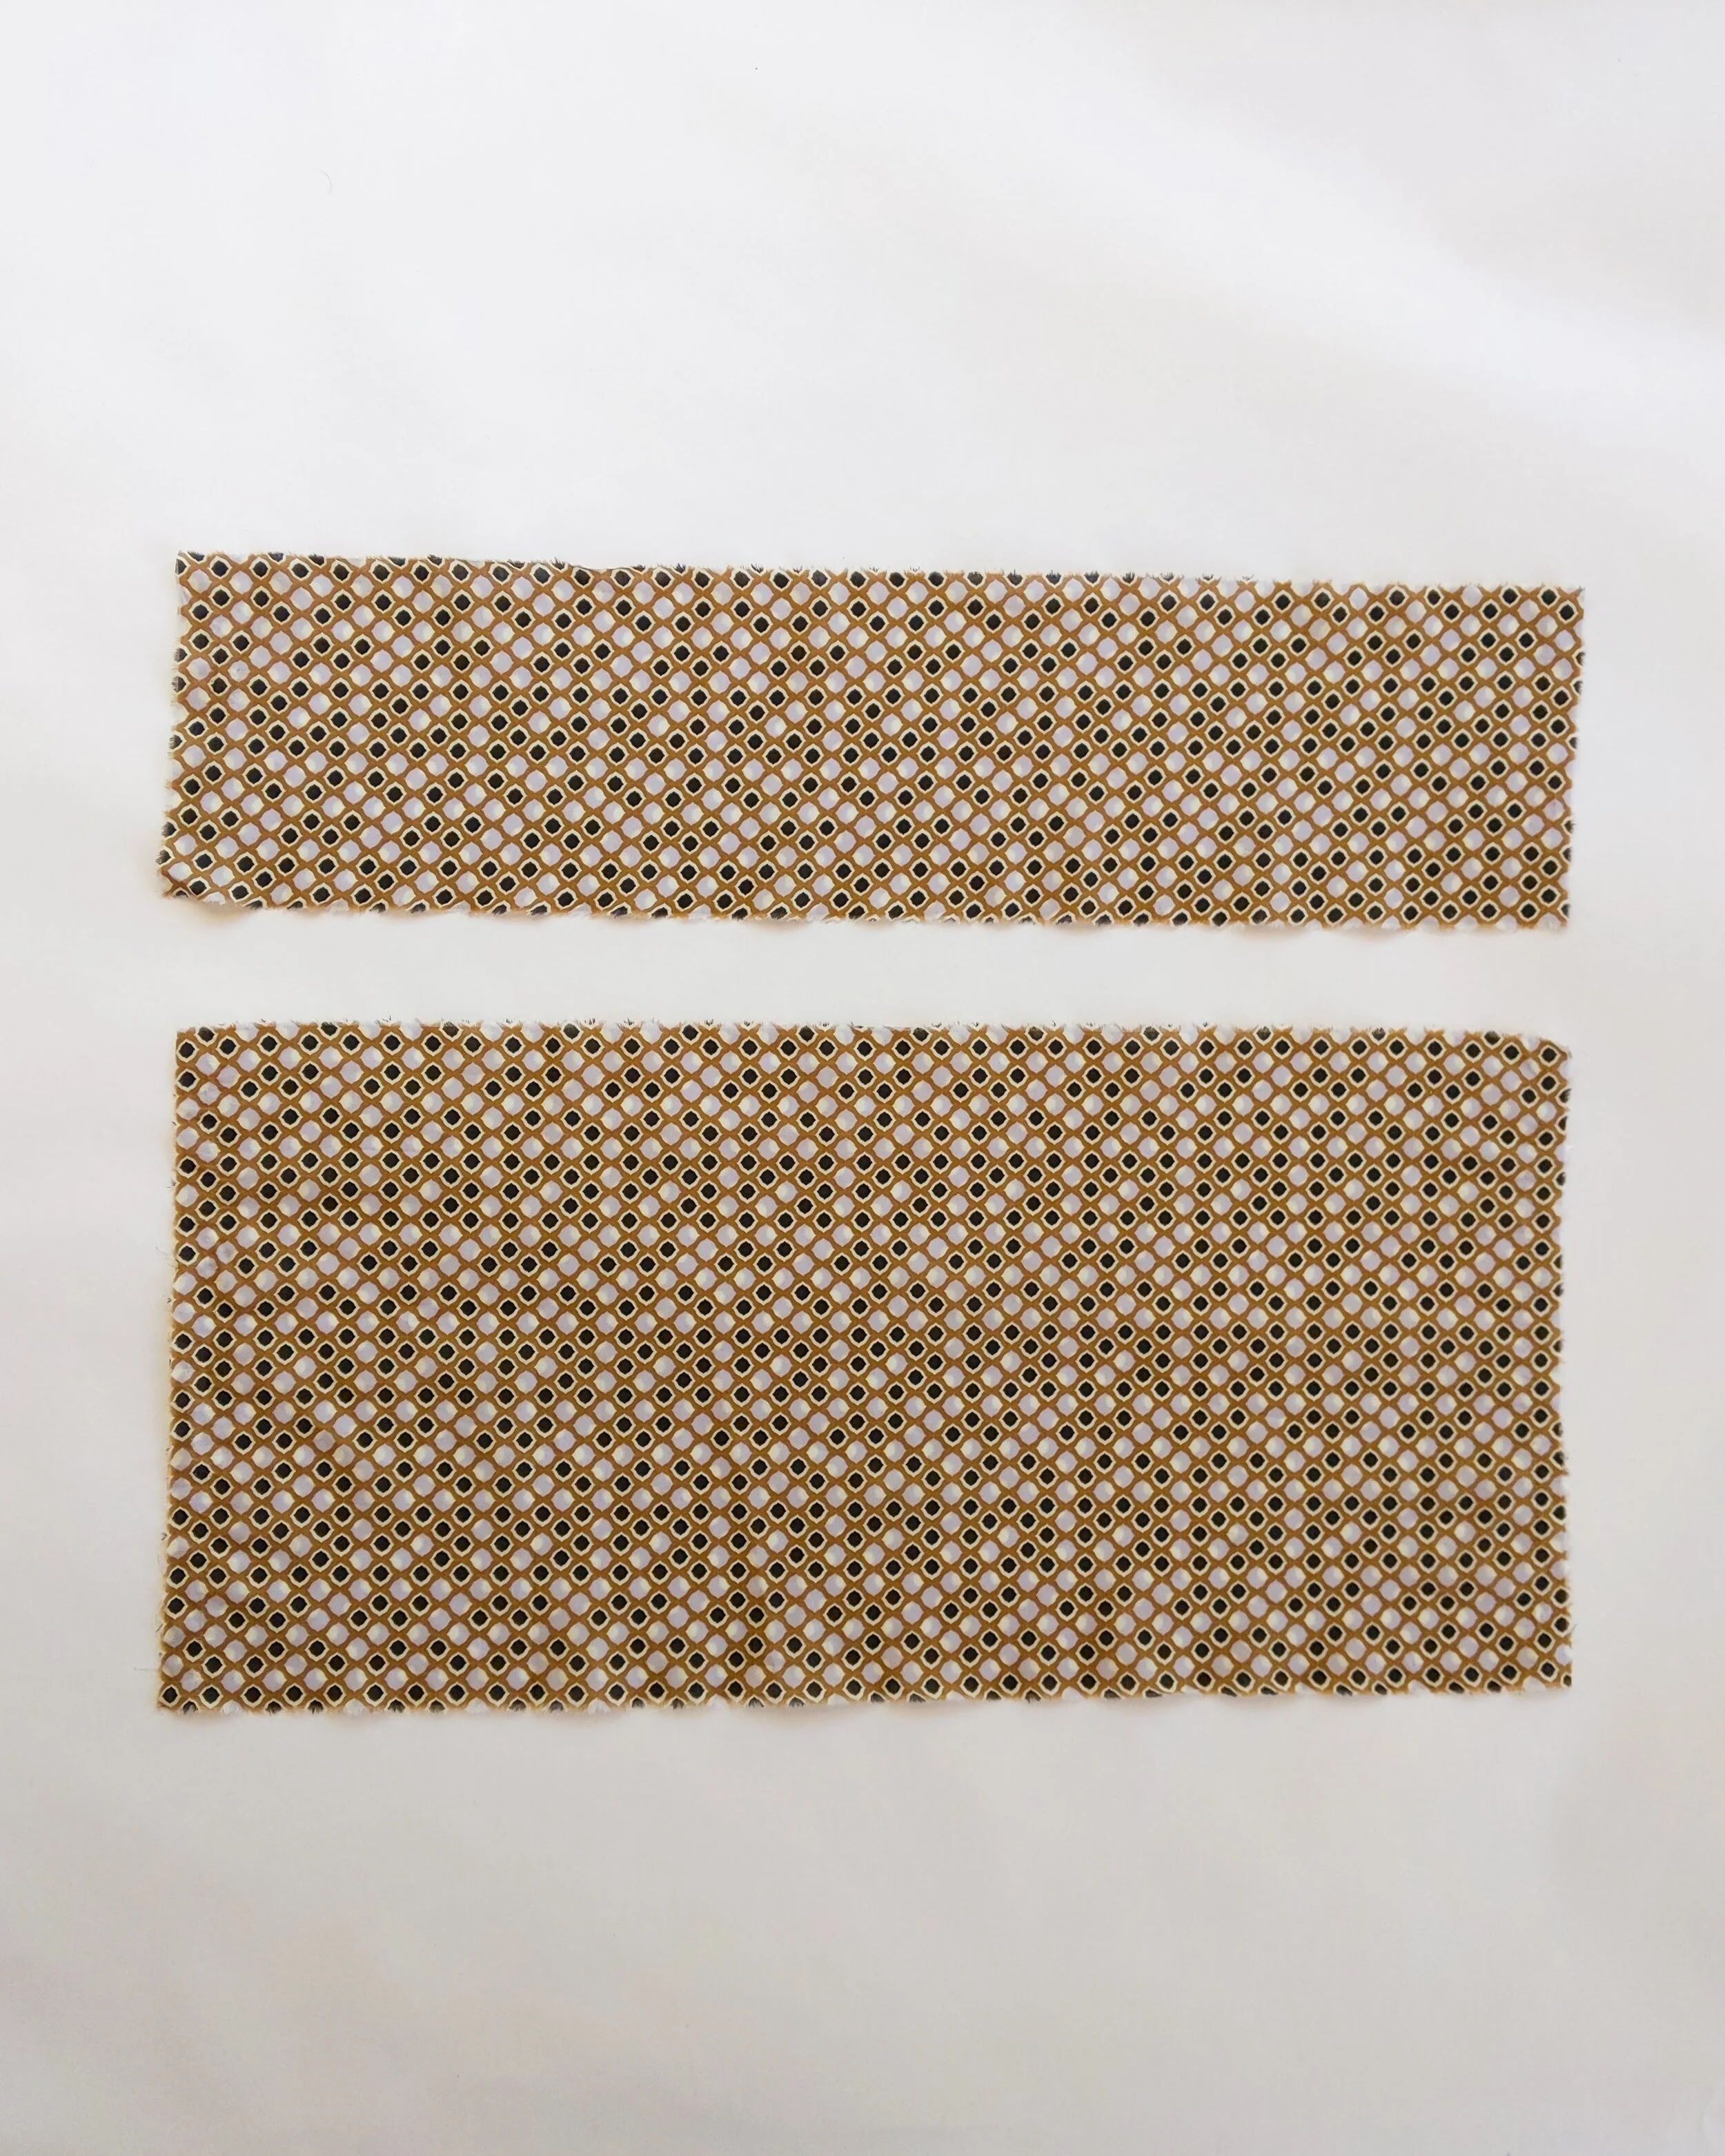
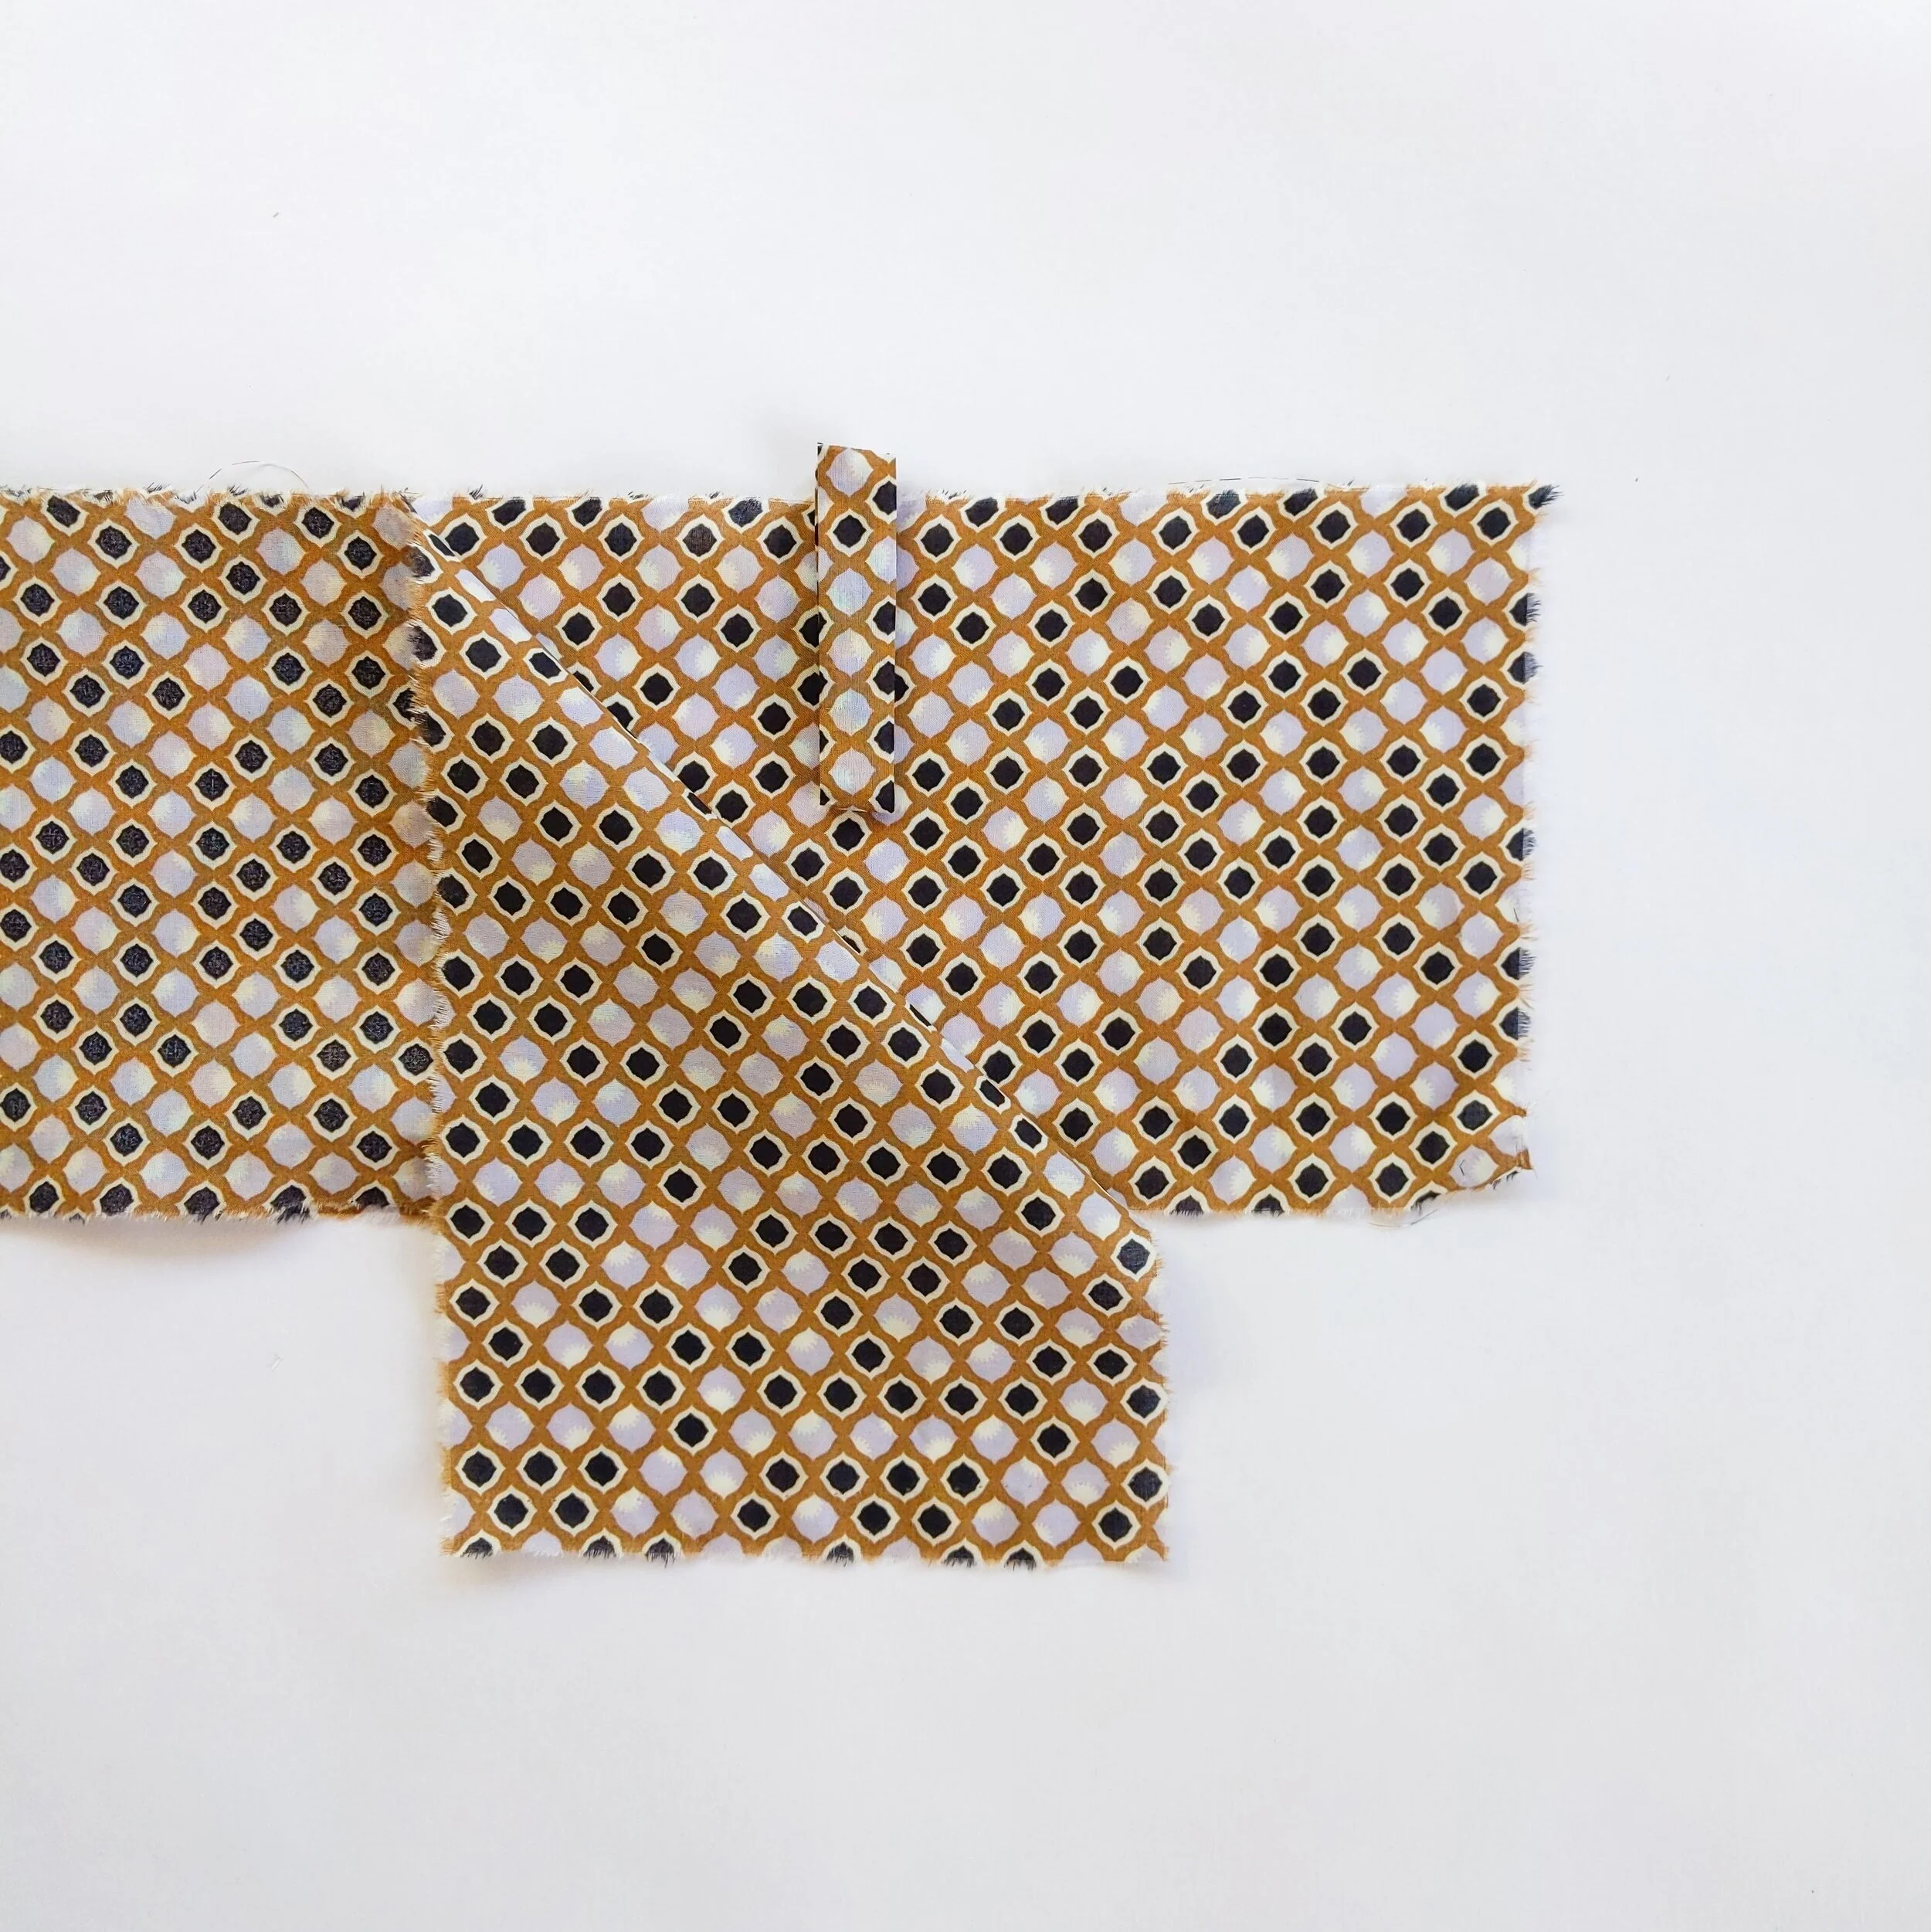
Step 2.
Let’s make straps. Fold the strap over right sides together and sew up the sides to make a tube. I cut my straps from the side of my Skirt Rectangles. They are 95cm x 5cm.

Step 3.
Trim excess and turn out using a safety pin or your preferred method. Repeat so you have 2 straps.

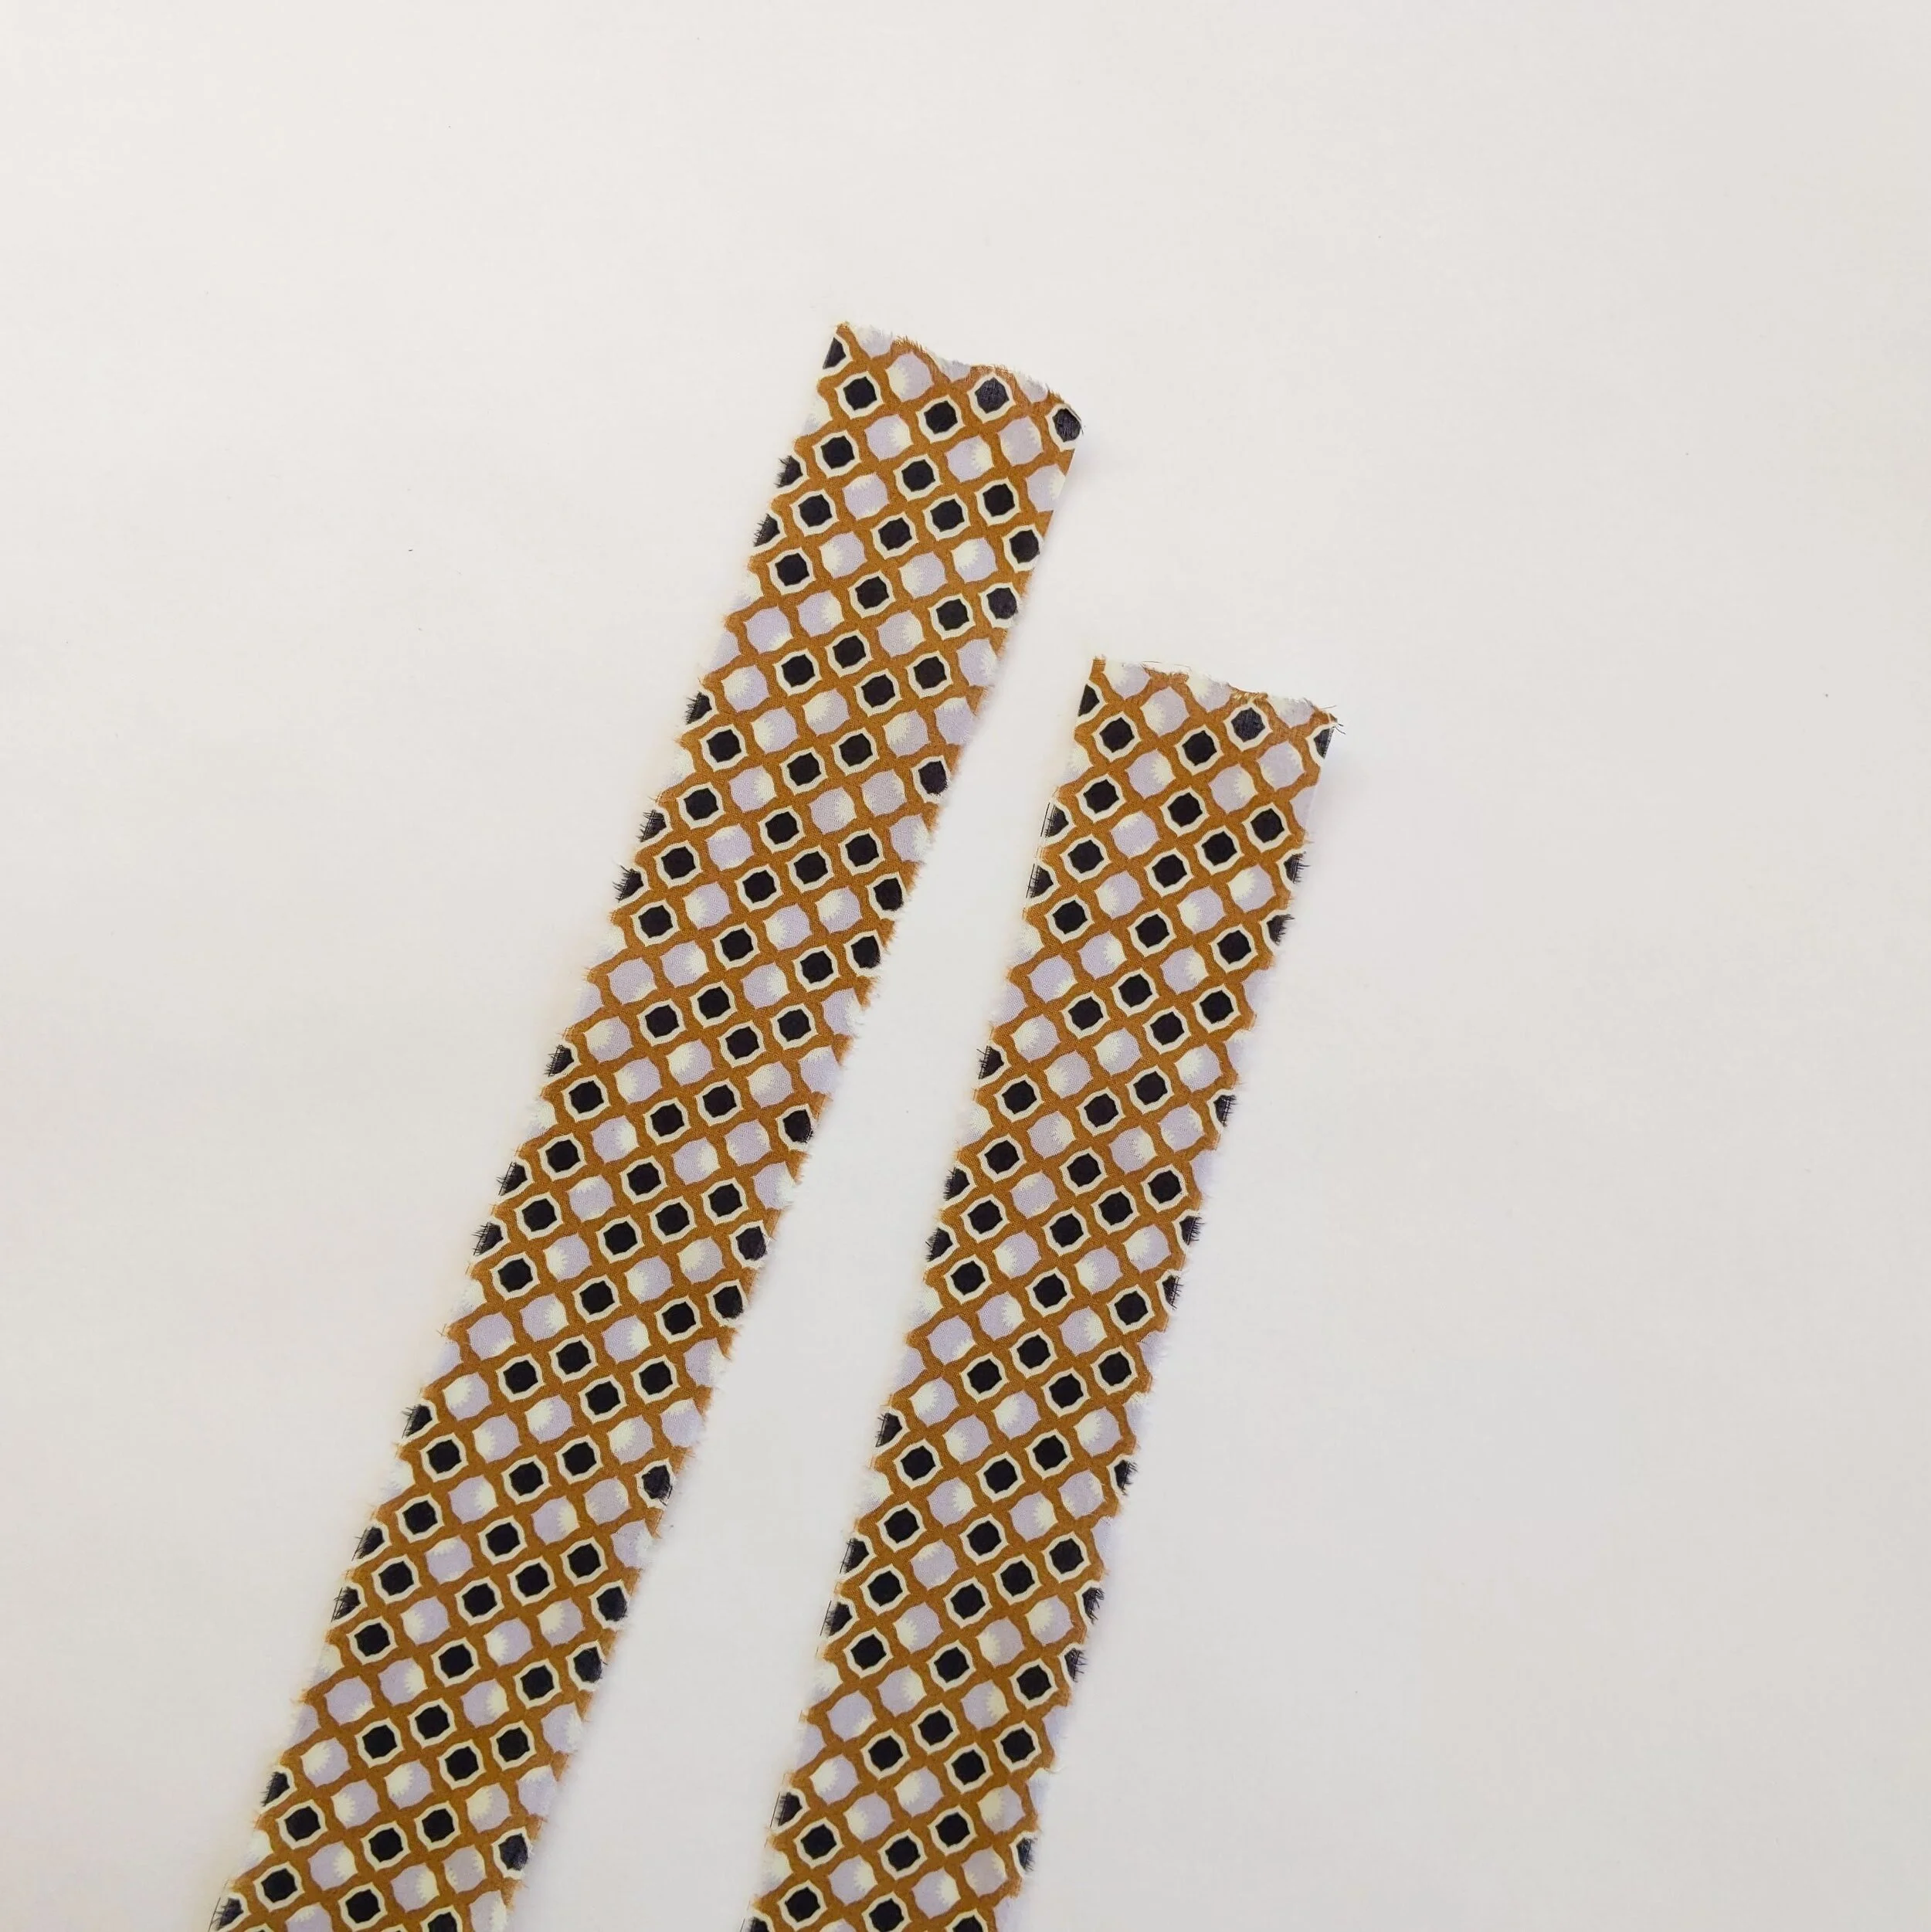
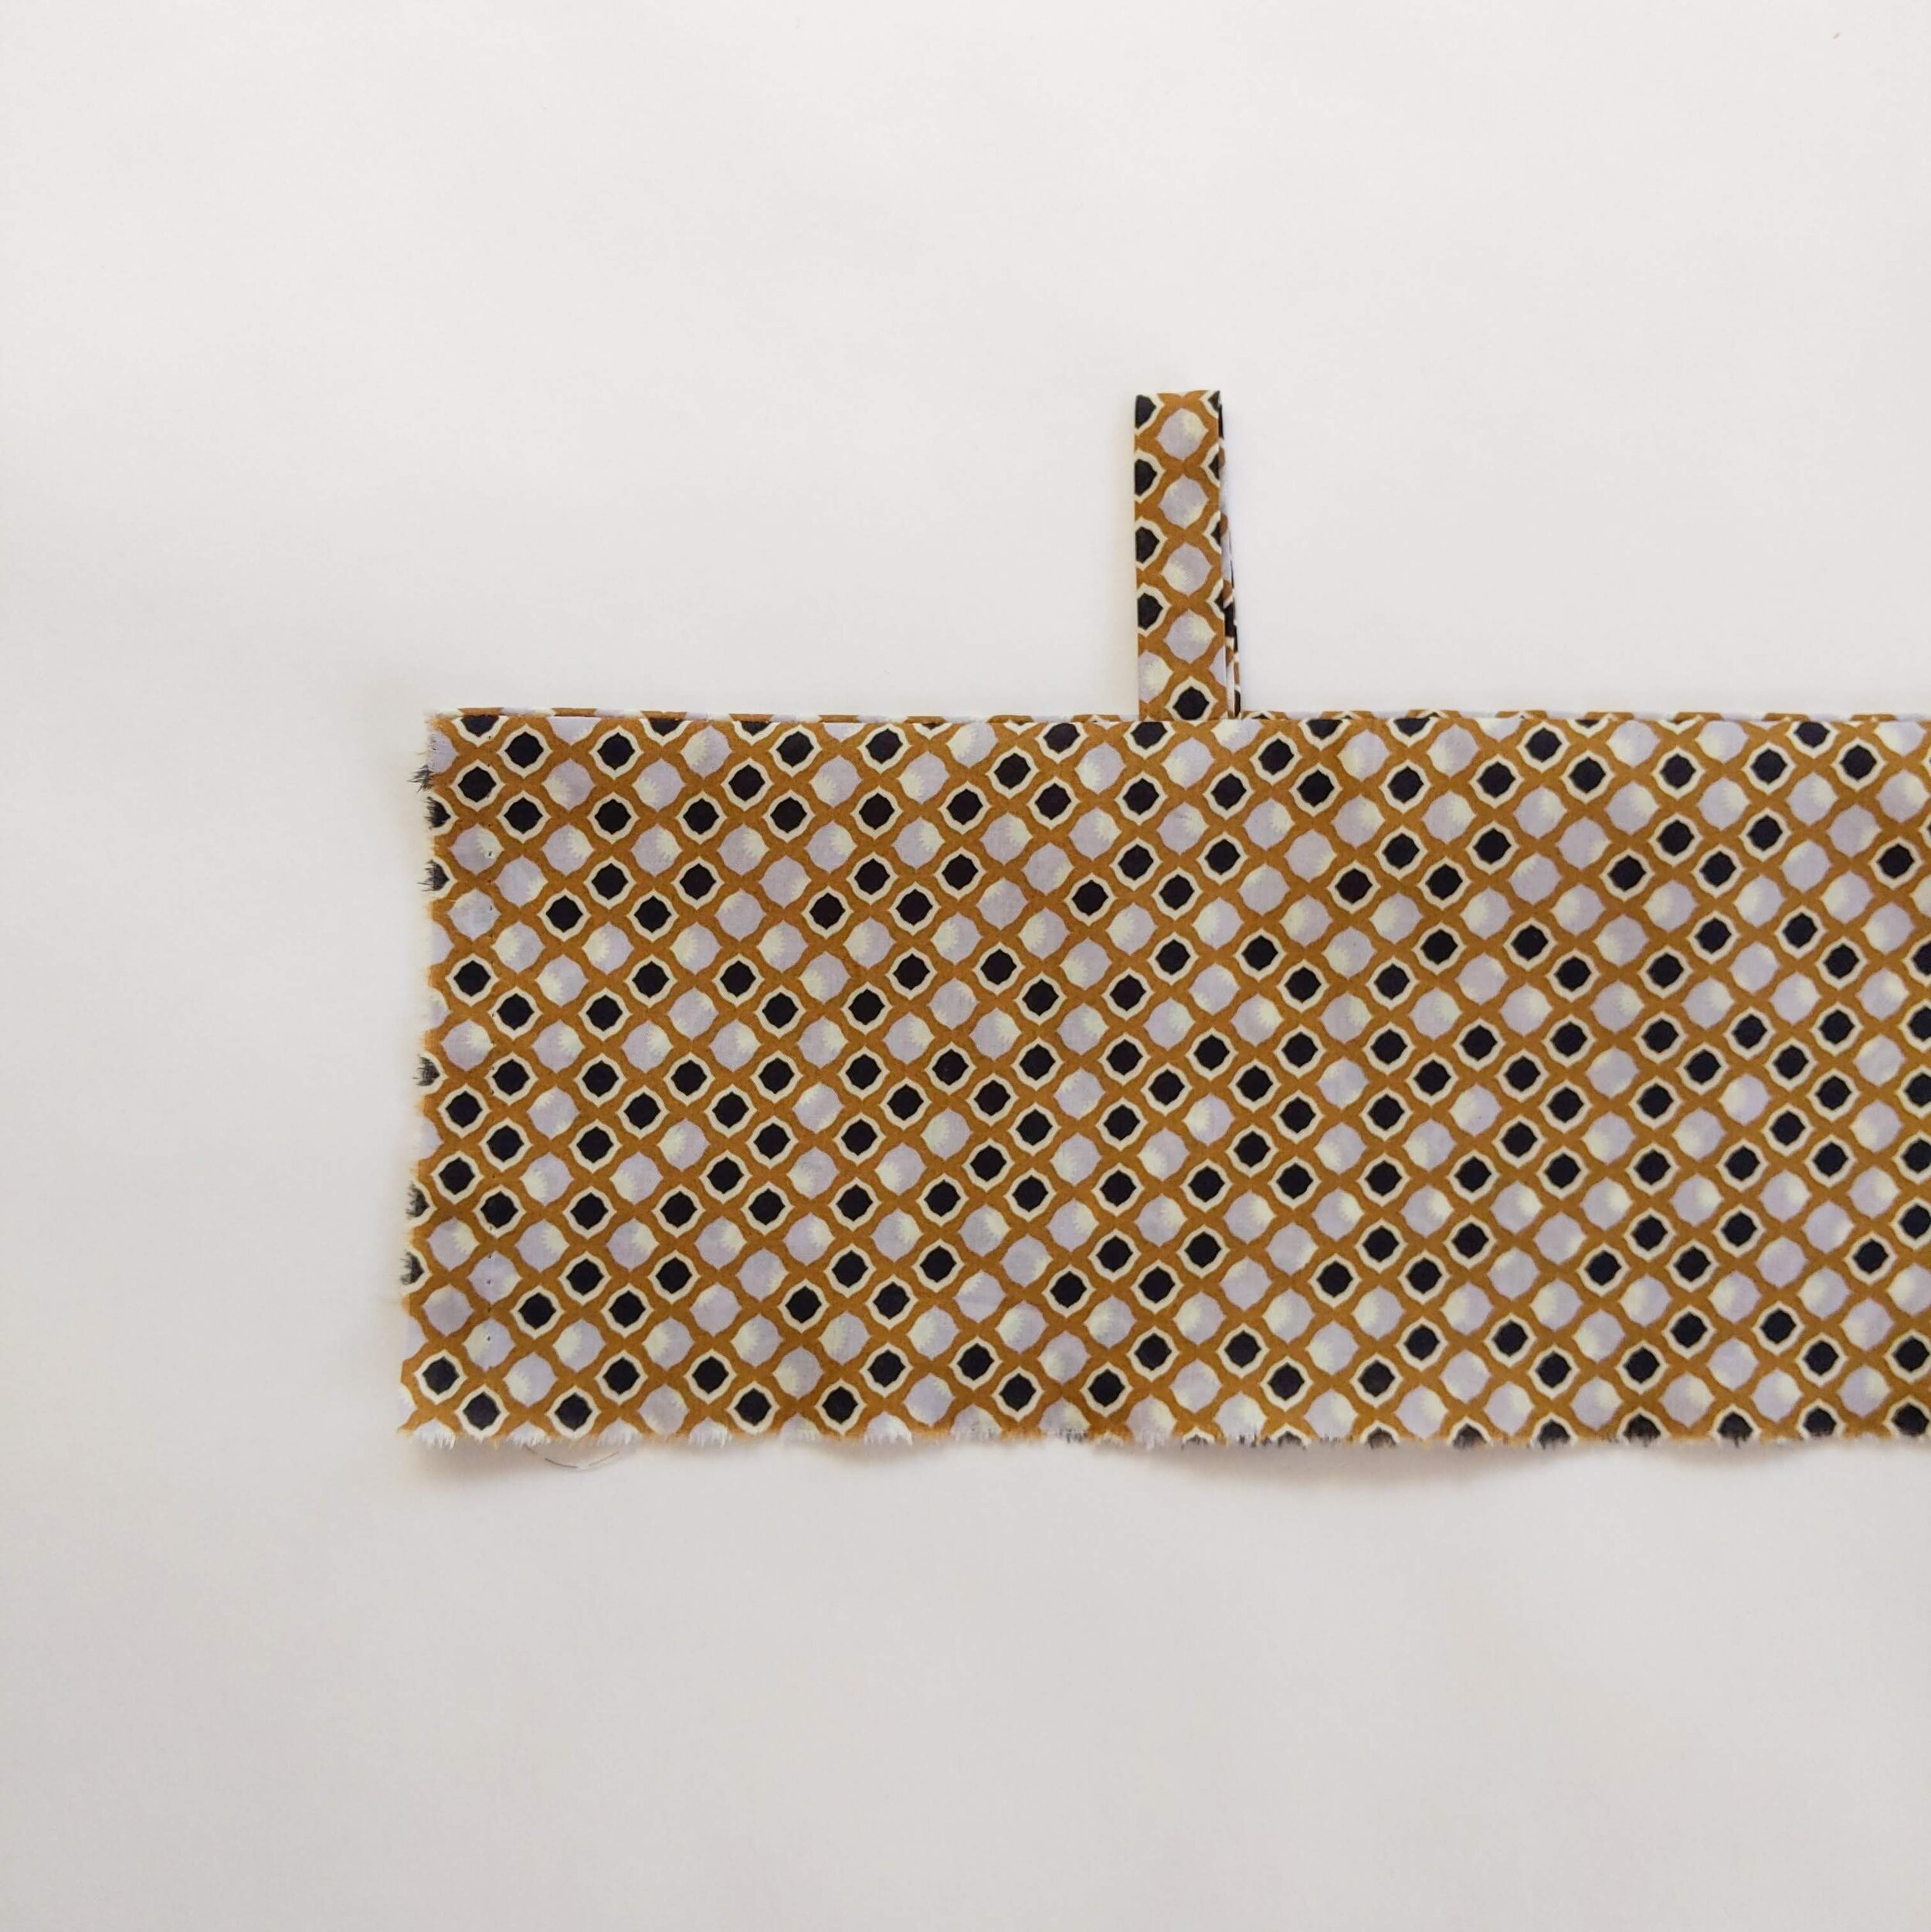
Step 4.
Cut into 2 x loops at 12cm and 2 x Straps at 83cm.
Step 5.
Sandwich loops between both Top Back pieces. I placed mine 11cm from the sides. Sew a straight stitch along the top.
Step 6.
Fold over and press.

Step 7.
Repeat step 6 with Top Front pieces and Straps. I placed my straps 12cm in from the sides. Loop and Strap placement may differ for you so I suggest using a really long stitch length incase you need to unpick and move. Then you can use a standard stitch length when you have your placement right.
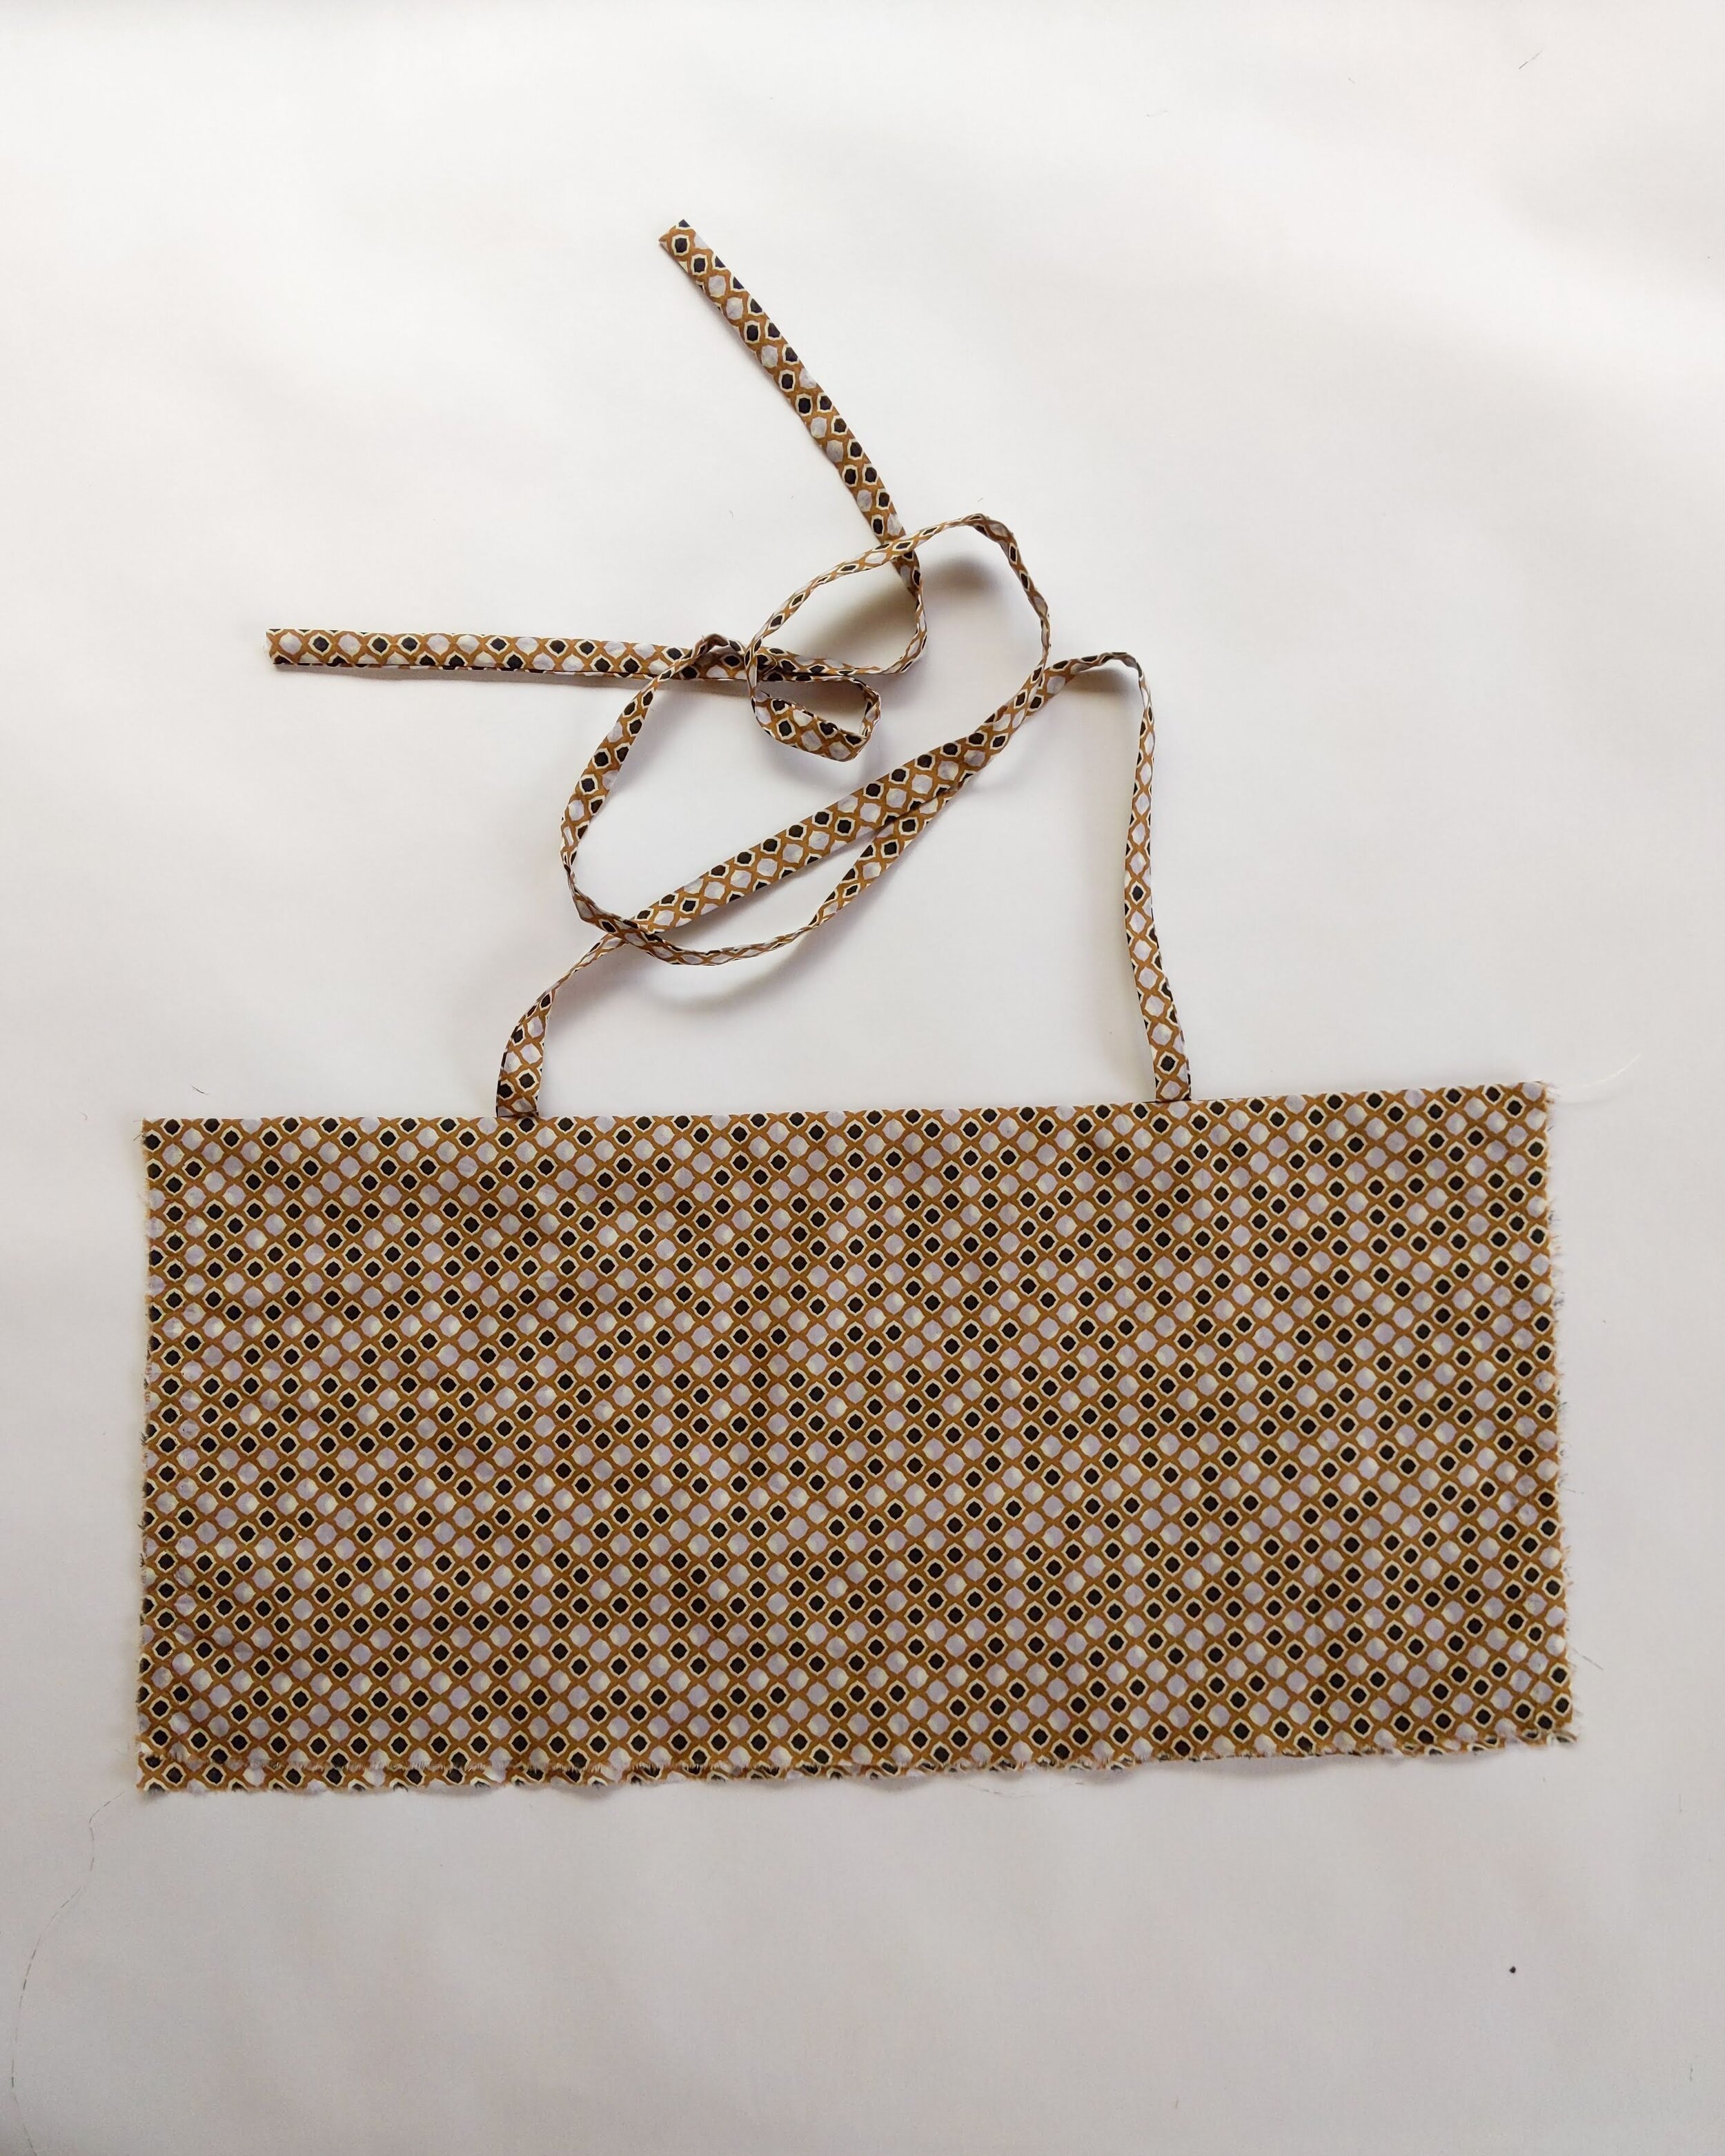
Step 8.
Fold over and press.

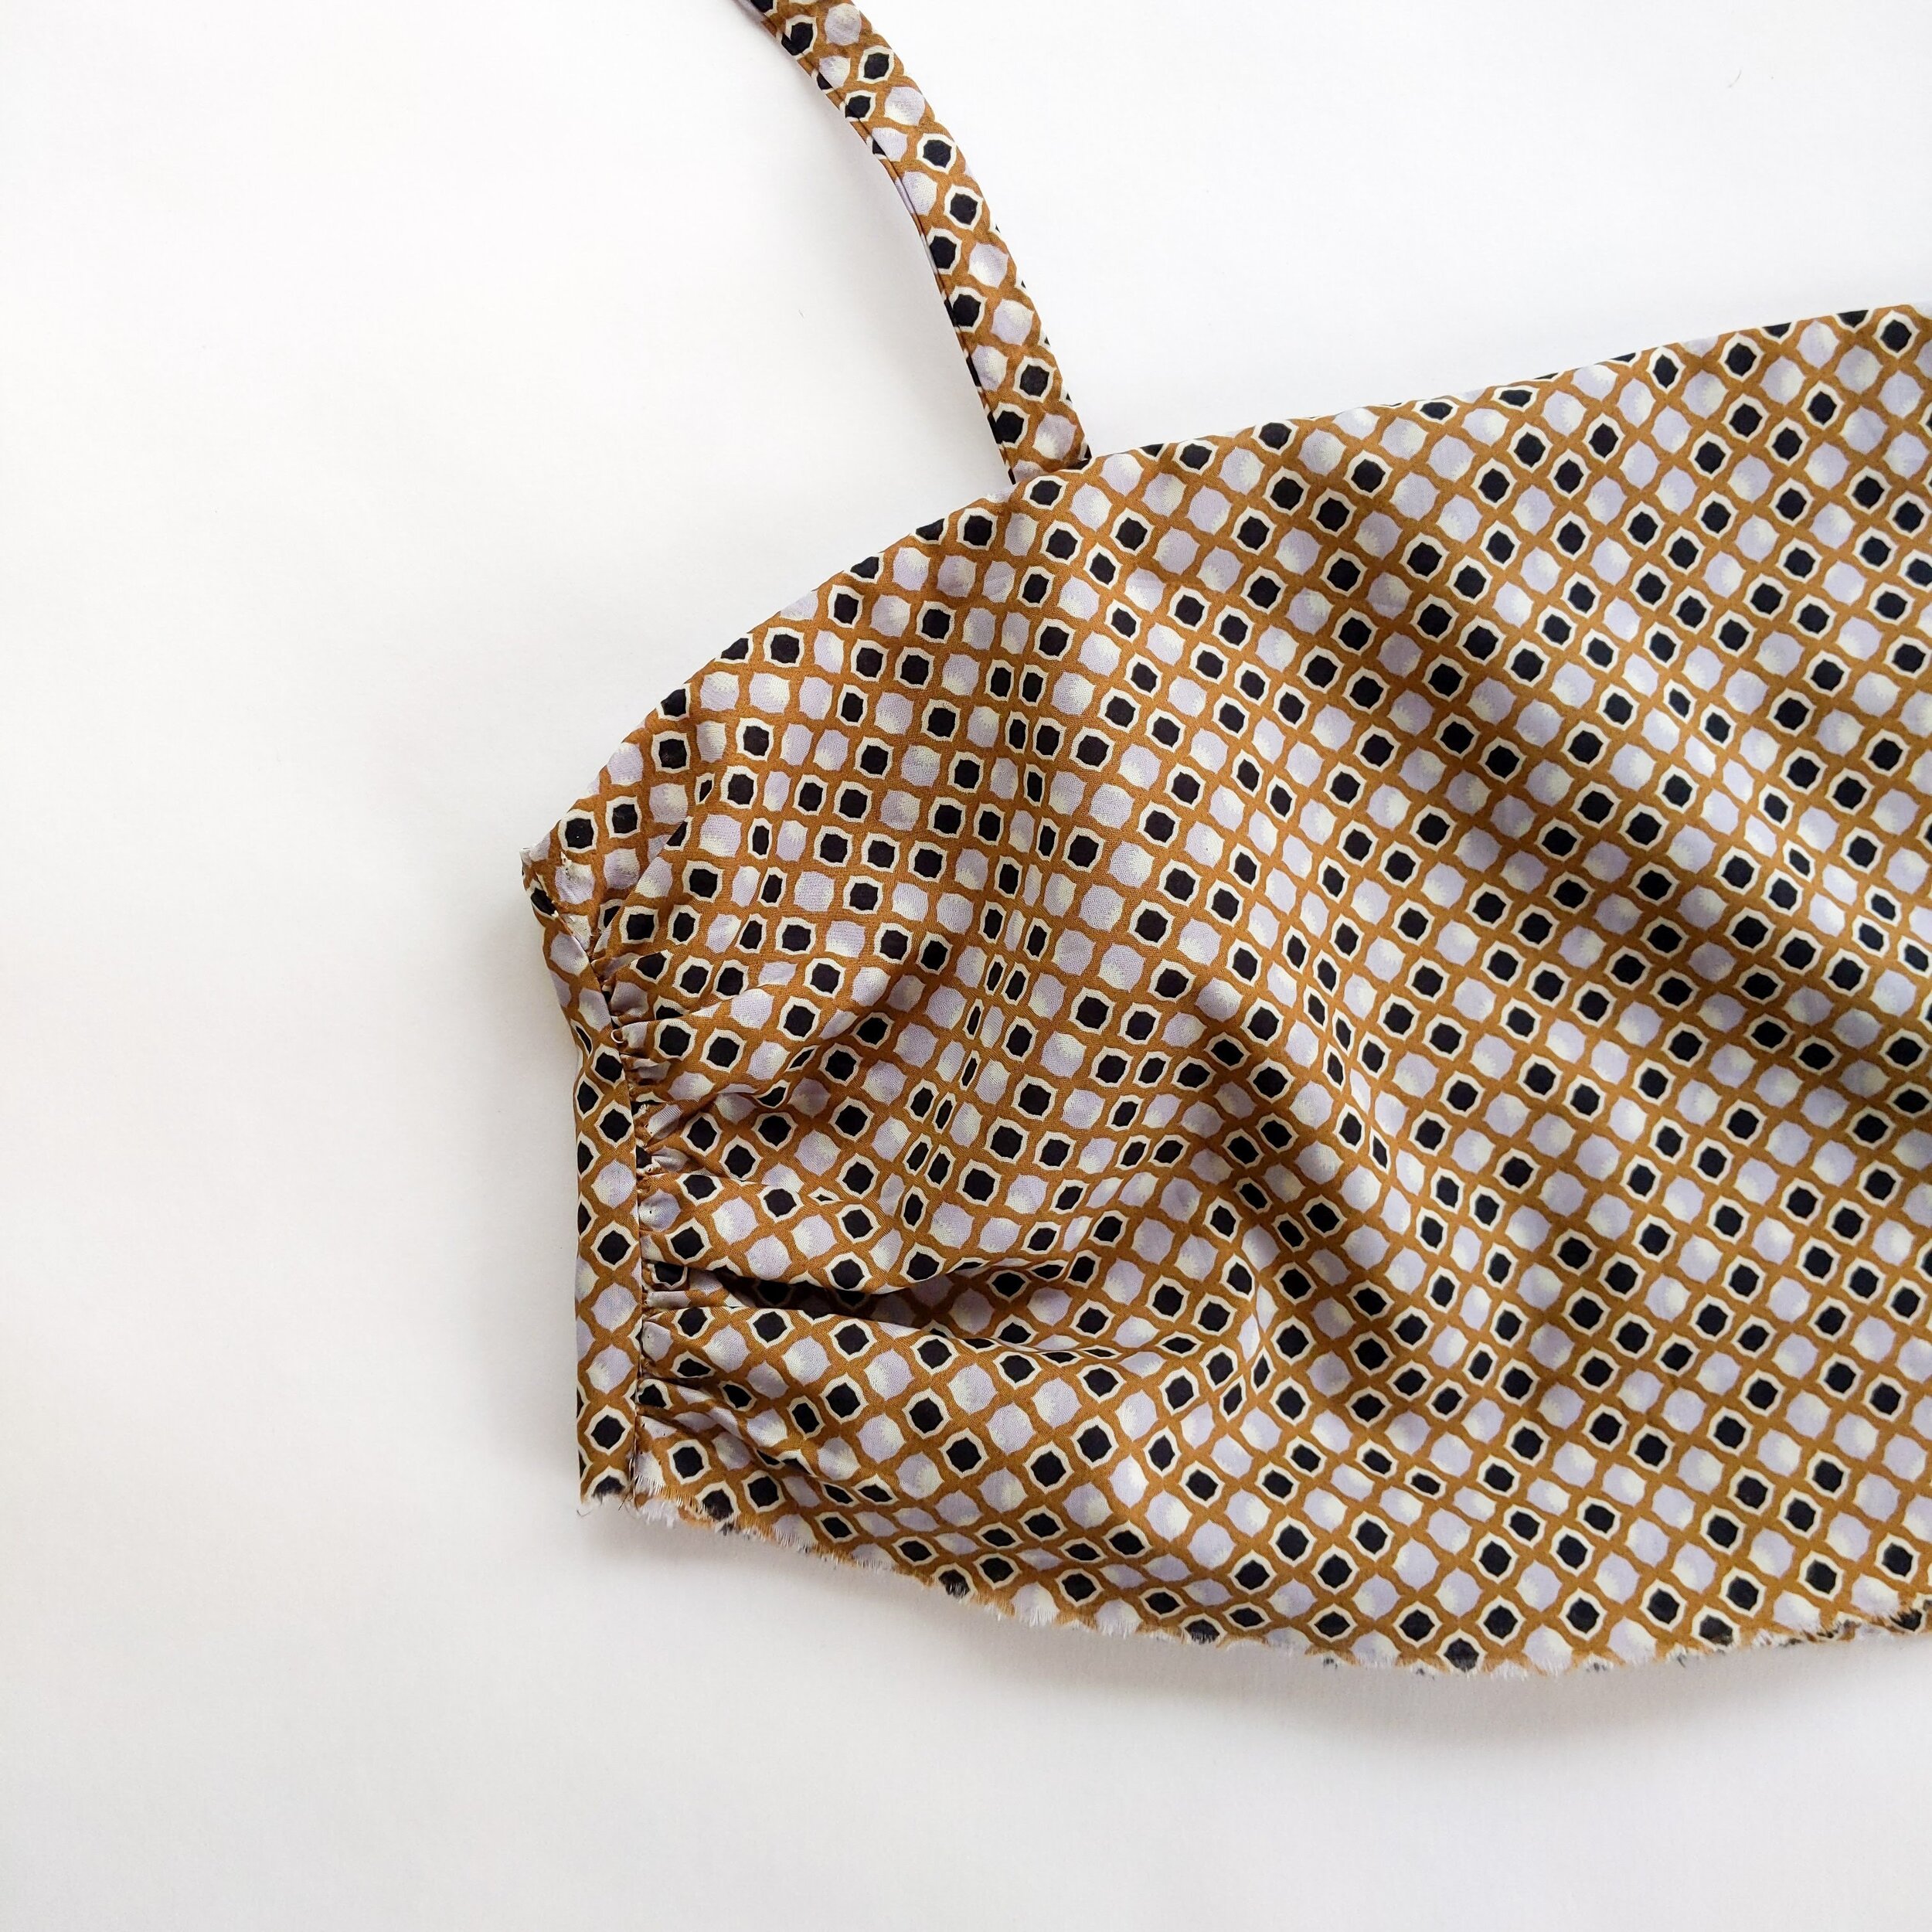
Step 9.
Gather sides of Top Front to be the same height as your Top Back pieces. Place right sides together and sew a straight stitch.
Step 10.
Pause to high five yourself for making it this far! Not far to go now, you’ve got this :D

Step 11.
Place Skirt Rectangles right sides together and sew up sides. Gather around the top of your giant skirt tube and then attach to the bottom of the top.

Step 12.
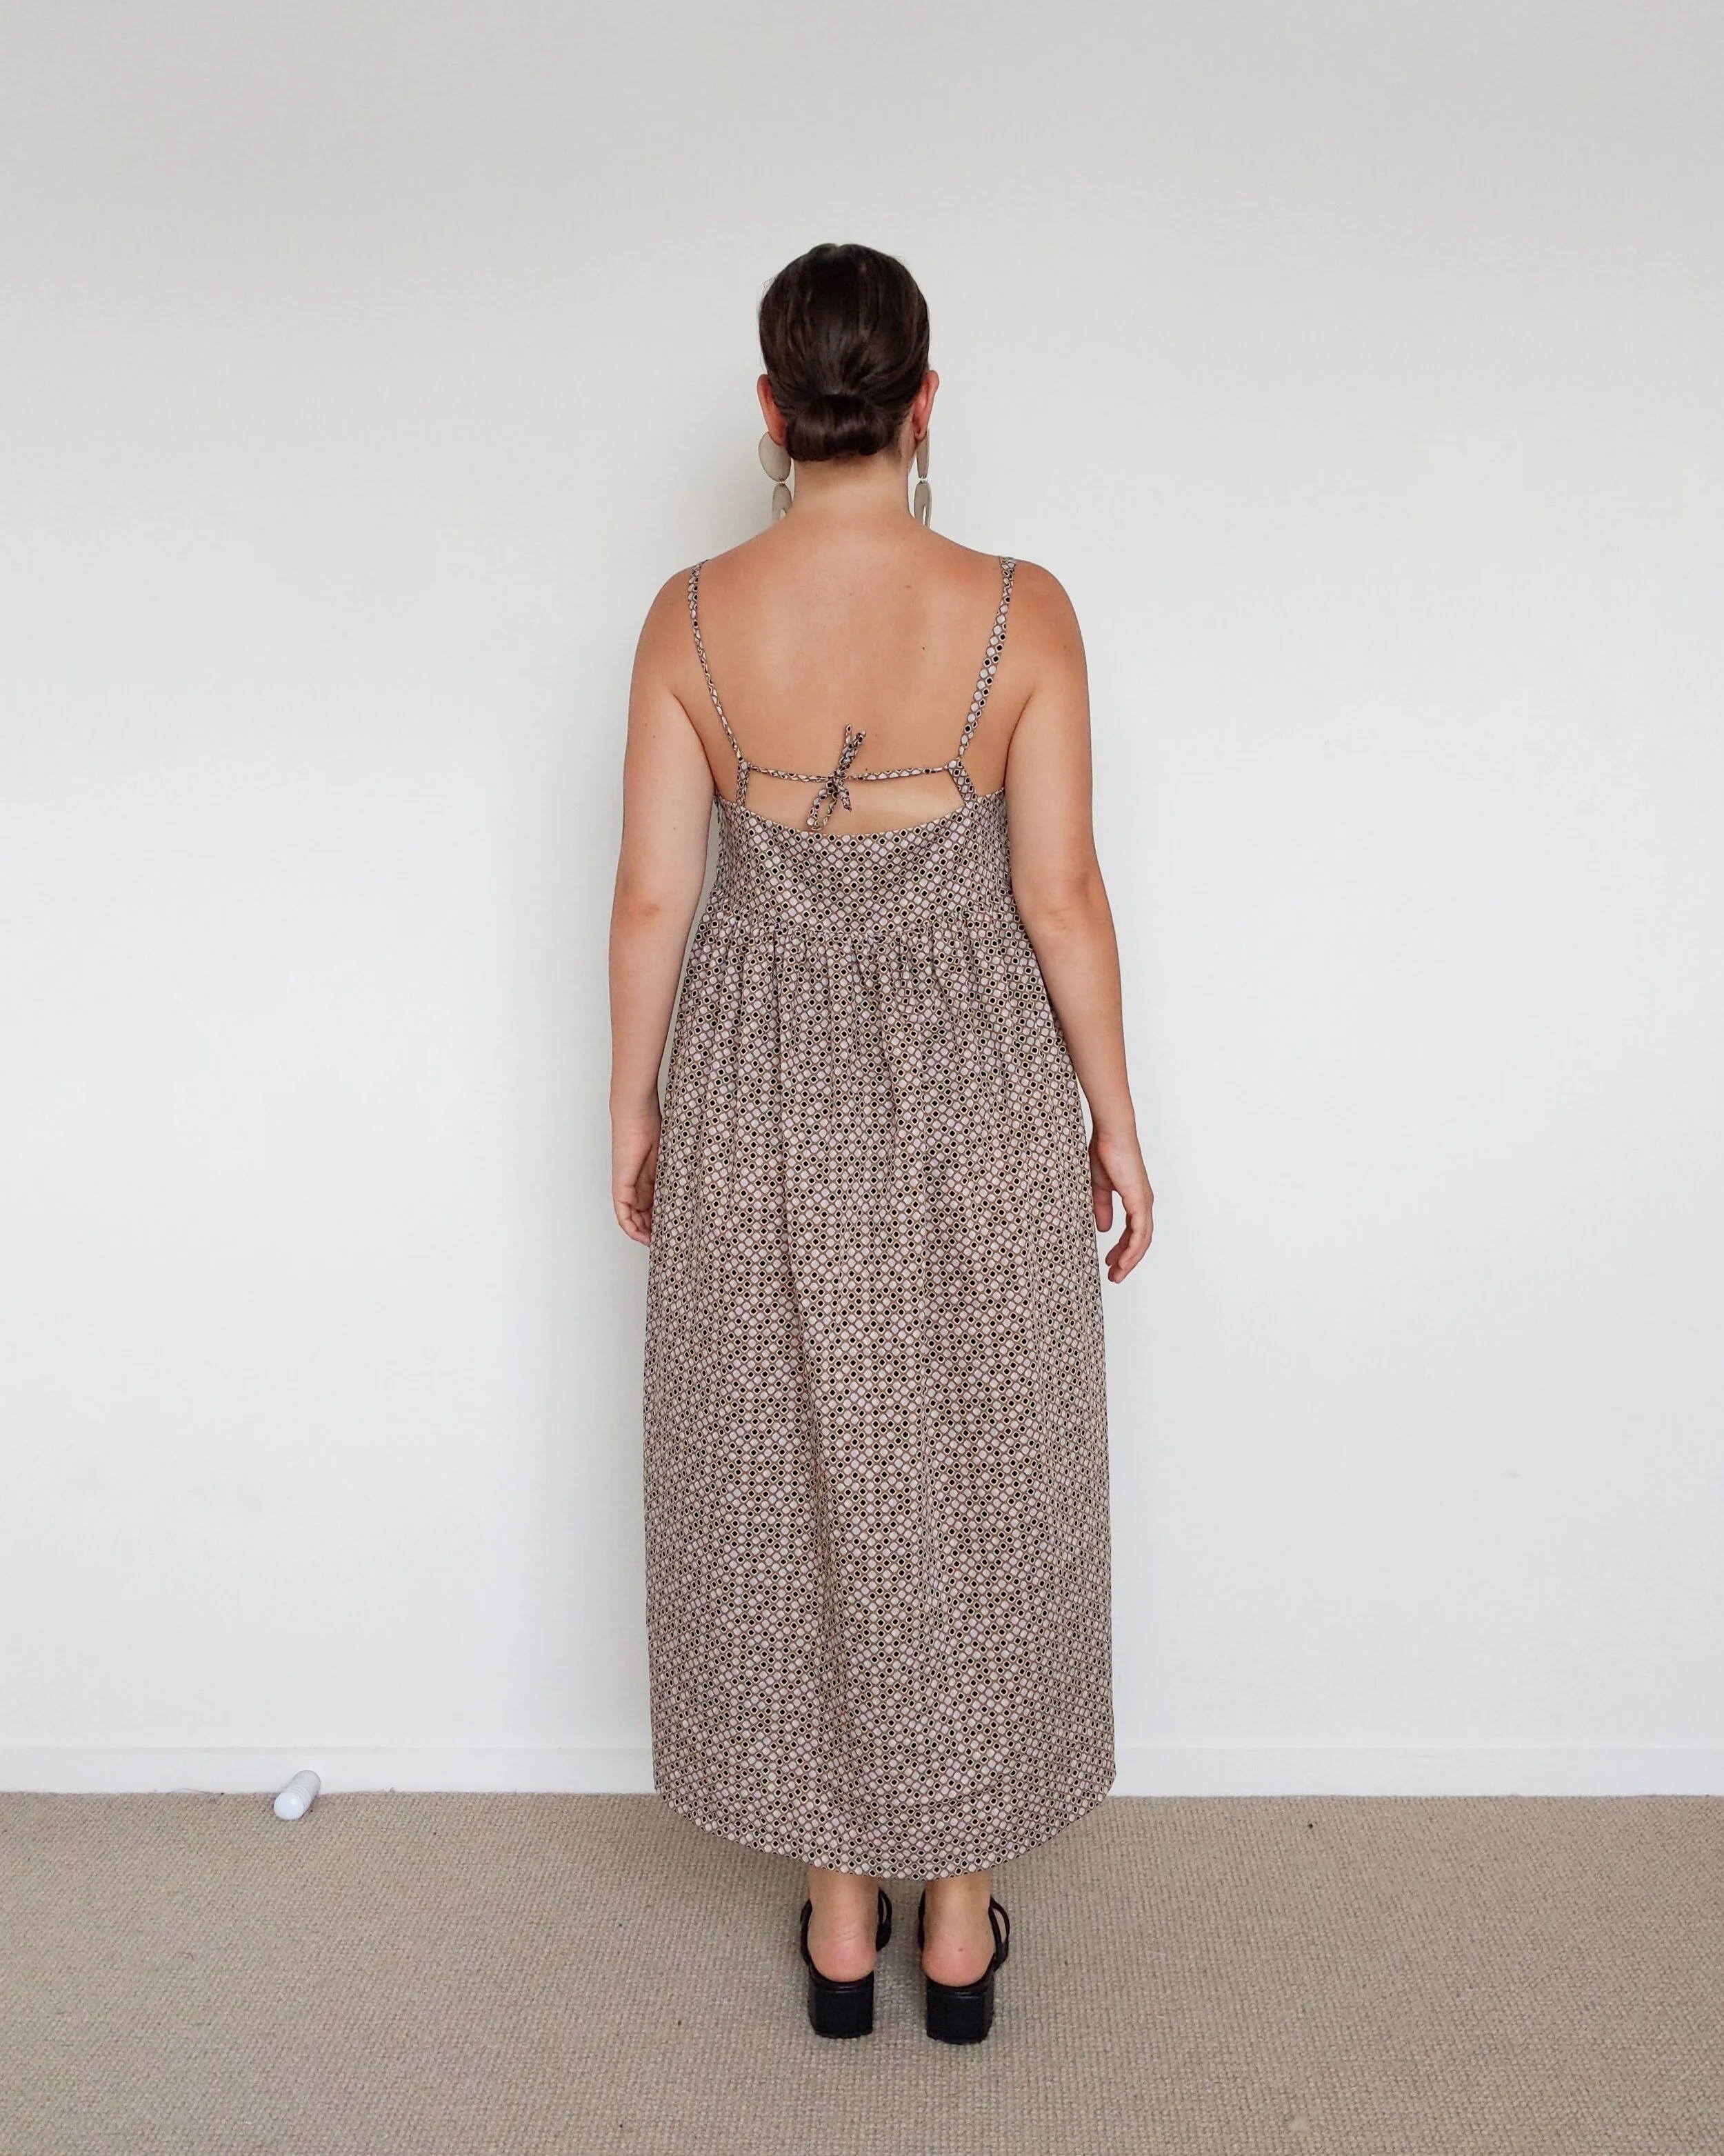
Hem, press and tie up your straps on the back. You are finished!


Like all of my sewing project tutorials, it’s a DIY one so if you do give this a go, please do a practice run or make a toile. I’m not a professional pattern maker and I have no formal training but this stuff gives me life, I bloody love it and I hope you do too! I’ve tried my best to make these instructions clear and coherent but if you do find something that I have missed or that needs more elaboration, please let me know so I can make it better. Finally, if you don’t know how to do something (e.g. gathering) head to youtube, give it a google and get practising. I leave those instructions out of my tutorials because there are already so many fab resources on the internet and I just don’t think I could explain it as well and they have!
Fabric: Byzantium Liberty Tana Lawn from The Fabric Store